Section 1- Basics
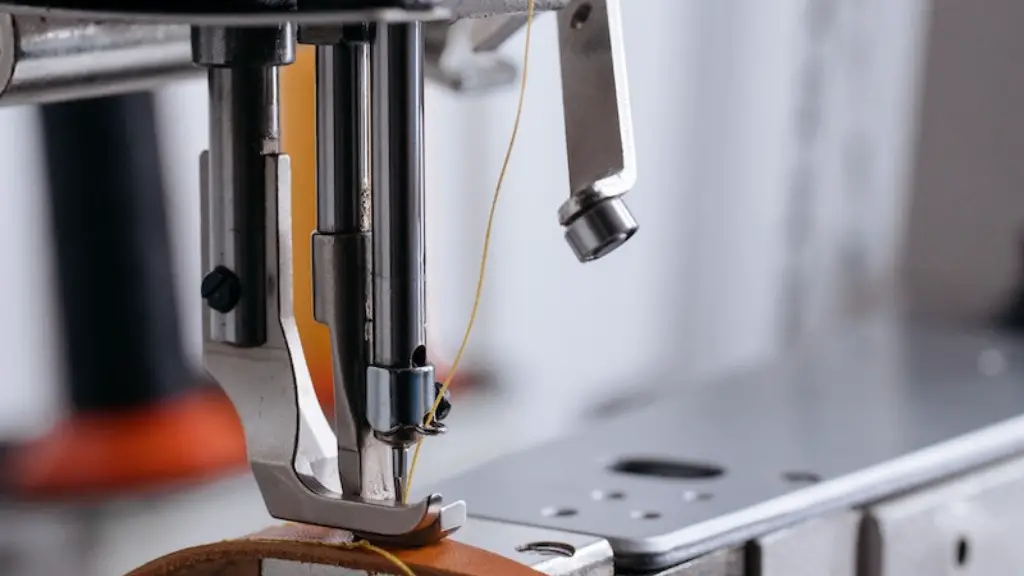
Adjusting the presser foot of a sewing machine is an essential skill to master in order to sew fabrics together. It involves properly setting up the foot and properly securing the fabric before beginning to sew. The process is easy and straightforward, but certain mistakes can lead to major issues in the long run – this is why it’s important to follow the necessary steps.
Firstly, make sure the needle is in line with the presser foot and that the needle is slightly above the foot. Then, ensure that the presser foot is firmly clamped into place. Once the presser foot is securely in place and aligned, the next step is to turn the wheel or lever on your machine to raise the foot. Once it is raised, the foot should be lined up with the feed dogs, which are the small teeth on the side of the bobbin case.
Alternatively, some sewing machines will have a presser foot pressure adjustment specific to the presser foot you are currently using. This adjustment allows you to adjust the pressure of the presser foot to ensure that it has a tight grip on the fabric while sewing. It will also ensure that the stitches are evenly distributed resulting in a clean stitch line.
Finally, when using a zigzag foot, make sure the machine is set to the correct width for the foot by raising and lowering the needle. This will perfectly align the foot with the fabric and help you to achieve perfectly straight lines.
Section 2- Types of Presser Feet
Not all presser feet are the same. The type of presser foot you use can affect the way your fabric is fed through the machine. Different feet serve different functions and need to be fully adjusted to get the best possible results.
Basic presser feet are designed for most general types of stitching. This includes straight stitching, zigzag stitching and buttonholes. This type of foot is often made of metal or clear plastic and is great for lightweight fabrics such as cotton or even silk.
Speciality feet are often used for more advanced projects, such as beadwork, quilting, and smocking. These speciality feet are typically made of metal and have small guides that help to place the design elements accurately. This type of foot is good for heavier fabrics such as denim or canvas that ordinary presser feet cannot handle.
Finally, there are also decorative presser feet. These feet are used for specialty decorative stitches such as appliqué and decorative stitching. These presser feet often come with different settings so that you can adjust the stitch width and length to create intricate and beautiful designs.
Section 3- How To Choose The Correct Foot
Choosing the correct presser foot for the job is the key to achieving successful results. Here are some tips for selecting the correct foot for your project:
Firstly, decide what type of stitch will work best for your project. This will usually determine what type of presser foot is required. Different presser feet are designed to create different types of stitching, so it is important to select the right foot for the job.
Secondly, consider the fabric that is being used. If you’re using a heavyweight fabric such as canvas or denim, it is better to use a specialty foot than a general-purpose foot. Similarly, if you’re using lightweight fabrics such as silk or lace, it is best to use a basic presser foot to avoid any damage to the delicate fabric.
Finally, check the stitch width settings on the machine before you purchase a foot. Different fabrics require different stitch width settings. For example, if you’re using a heavyweight fabric such as denim, you’ll need a foot with wider settings than if you’re using lightweight fabric such as cotton.
Section 4- Tips For Beginners
Learning how to use a sewing machine can be daunting, especially when it comes to adjusting the presser foot. Here are some easy tips for beginners to help make the process easier.
Firstly, make sure to practice your skills on a scrap of fabric. This lets you practice adjusting the foot without committing to a project. This way, you can try different stitches and experiment without risking ruining your fabric.
Secondly, even if you’re using a specialty foot it’s best to start off with the basic foot to get the basics of stitching down. It is a lot easier to get the hang of using a plain foot than a complicated one. Once you feel comfortable with the basic foot, you can move onto more advanced feet.
Thirdly, check your machine manual carefully. Every machine has different instructions and settings, so it’s important to familiarize yourself with these to avoid making any mistakes. Always read up on the instructions before attempting to use the machine.
Finally, take your time. Sewing can be tedious and time-consuming, but it’s important to take your time when adjusting the presser foot. Improperly adjusted feet can lead to uneven stitching and difficulty feeding fabric through the machine. So it is important to double-check the foot and the settings before sewing.
Section 5- Troubleshooting Common Issues
Even experienced sewists can encounter common issues when it comes to adjusting the presser foot of a sewing machine. Here are some tips for troubleshooting common issues.
If the presser foot is not properly aligned or is not firmly in place, the fabric may not feed through the machine properly. In this case, check the alignment of the foot and adjust it if necessary. If the foot is firmly in place but still not properly aligned, you may need to adjust the pressure adjustment on your machine.
If the presser foot is not gripping the fabric properly, check that the presser foot is the correct type and pressure for the fabric. If the foot is the right one, check the pressure setting and make sure it is set to the right pressure for the fabric. If the foot keeps slipping or is not gripping the fabric properly, it may be time to replace the presser foot.
If the stitches are uneven, check that the foot is properly aligned with the feed dogs. Also, ensure that the needle is correctly set up and that the stitch width and length settings are correct. Finally, make sure that you’re taking regular breaks so that you’re not overtiring yourself.
Section 6- Advantages of Adjusting the Presser Foot
Adjusting the presser foot on a sewing machine can be an intimidating task for new sewists, but once you master the technique, you will be able to achieve better results and have more control over the fabric. Here are some advantages of correctly adjusting the presser foot:
Firstly, correctly adjusted presser feet will help you to achieve more consistent and professional results. This means that all of your stitches will be even and your fabric will move through the machine smoothly.
Secondly, you will be able to sew faster with an adjusted, properly clamped presser foot. This is because the fabric will move through the machine more quickly, which will save you time.
Thirdly, properly adjusted presser feet can save you money in the long run. An improperly adjusted foot can lead to skipped stitches, uneven hems, and puckering, which can all lead to costly repairs and replacements.
Finally, adjusting the presser foot eliminates guesswork when it comes to positioning the fabric under the foot. This allows for greater precision and accuracy with every stitch.
Section 7- Care and Maintenance Of The Presser Foot
The presser foot on a sewing machine is a delicate and important part of the machine. It is important to take care of it in order to extend its life and ensure it continues to perform optimally. Here are some tips for caring for your presser foot.
Firstly, make sure to use the right presser foot for the fabric you are using. Using different presser feet for different types of fabric will not only help to avoid damage to the fabric but also to the presser foot.
Secondly, keep the presser foot clean and lubricated. Use a soft cloth to wipe away any lint or dust that has accumulated. Also, use a light machine oil to lubricate the presser foot and ensure it is working smoothly.
Thirdly, check the tension on the presser foot before beginning a project. Adjust the tension if needed, as too much tension can cause the presser foot to become stuck and too little tension can lead to skipped stitches.
Finally, after each project, make sure to adjust the presser foot and check if it is still in working order. Make sure to replace any parts that are worn and damaged before continuing to stitch.
Section 8- How To Use Presser Foot Pressure Adjustment
Presser foot pressure adjustment is a great way to ensure that the foot is properly gripping the fabric. Here are some tips for using pressure adjustment on your presser foot:
Firstly, always use a light pressure when adjusting the foot. Too much pressure may cause the material to bunch or distort and too little pressure may lead to skipped stitches or an uneven seam.
Secondly, pay attention to the way the fabric is moving. If it is not gliding smoothly under the foot, the pressure may be too low or too high. Adjust the pressure accordingly.
Thirdly, ensure that the presser foot pressure adjustment is adjusted correctly for the fabric you are using. If you’re using a lightweight fabric such as silk, the pressure should be set to the minimum. For heavier fabrics such as denim, the pressure should be increased.
Finally, take your time. Slow and steady stitching will help to ensure that the fabric lines up properly and that the presser foot is correctly adjusted for the fabric. This will help you to avoid mistakes and get the best possible results.
