Basics of Cleaning an Old Sewing Machine
Many people inherited or found an old sewing machine in need of a good clean. Cleaning an old sewing machine may seem daunting, but can become a rewarding experience. It is important to take time to properly clean and maintain an old sewing machine; this will help it to last for many years to come. The process may seem intimidating but with the right cleaning supplies and safety practices, it can become a fairly straightforward process.
Before cleaning an old sewing machine, it is essential to gather all the necessary supplies. Depending on the job, this can include yarn lube, silicon lube, sewing machine oil, tweezers, and a brush set, with needles, small screwdrivers, and a container.
When disassembling and cleaning an old sewing machine, it is important to take frequent breaks and to go slowly. It is wise to take pictures before cleaning the machine, this will make reassembly easier. It’s also helpful to set aside small parts in containers when they are removed. When cleaning, it’s best to refer to the owner’s manual that came with the sewing machine.
It is recommended to remove all dust and dirt with a brush or an air compressor. For dust and dirt that is too embedded to be removed with a brush or an air compressor, a soft cloth and gentle cleaning solution can be used. Once the sewing machine is wiped, it is important to oil all the relevant parts and use some lubricant, such as yarn lube, to reduce friction. For stubborn grime, it may be necessary to use an alcohol or solvent-based cleaner. Vodka or gin can be used for this if no other cleaner is available.
Finally, the sewing machine should be tested after reassembly and to ensure everything is working properly. It is important to thoroughly inspect the machine to make sure all the parts are in working condition. If anything appears to be malfunctioning, it may be necessary to take the machine to a professional sewing machine repairer.
Reattach the Needle and Bobbin
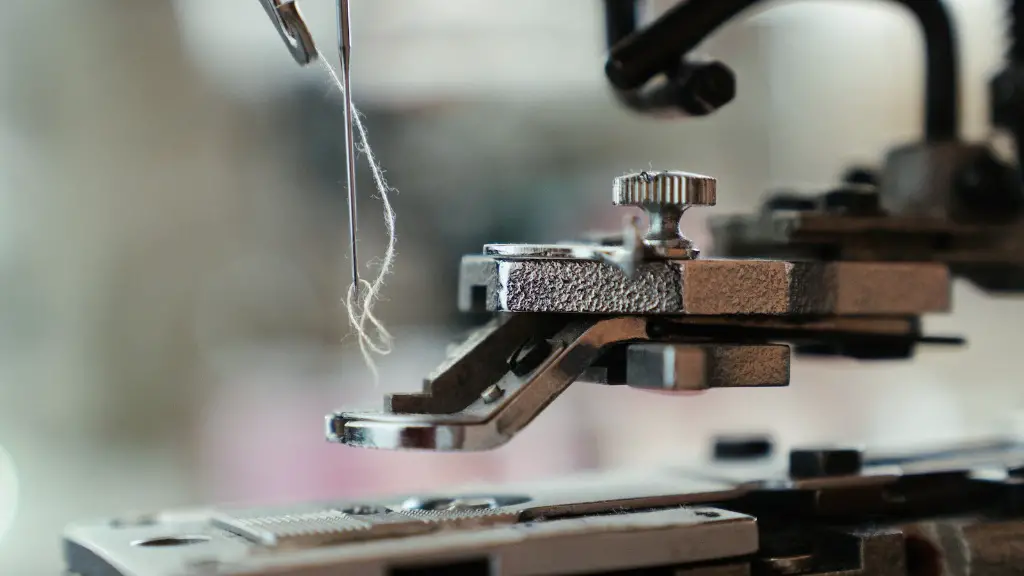
Before reattaching the needle, it is important to check that the needle is still in good condition. If the needle is bent, the eye blocked, or the needle shaft is broken, the needle should be replaced. To reattach the needle, the thread must be threaded through the needle’s eye and the thread must be pulled through until it is snugly seated. It is important to make sure the needle is seated properly before use. Once the needle is reattached, the bobbin should be placed in the bobbin case, which can be inserted into the sewing machine.
To load the thread, the thread is placed in the bobbin and the bobbin is threaded into the tension assembly. Finally, the bobbin is inserted back into the sewing machine and the thread is placed on the spindle. The machine may need to be adjusted to the correct tension when the thread is first loaded.
The bobbin must be seated correctly in the bobbin case before it is inserted into the machine. If the bobbin is not correctly seated, the thread may break during sewing. If the bobbin is correctly seated, the thread will slide over the bobbin hook without catching or looping. It is important to avoid overloading the bobbin and to adjust the machine settings as needed.
The next step is to ensure the needle is in the correct position. The needle should be set to the correct height and aligned with the presser foot. The pressure foot should also be properly adjusted, as this will ensure the threads are properly tensioned when sewing.
Finally, the needle should be inspected for any damage or cracks. It is also important to check that the needle point is sharp and intact. It is recommended to replace the needle every sixteen hours of usage. Replacing the needle regularly will help ensure better results when sewing.
Check the Drive Belt and Belt Tension
The drive belt is an important component of a sewing machine, as it transfers energy from the motor to the bobbin hook, enabling the hook to rotate. If the belt does not have enough tension it can affect the machine’s performance and cause the stitches to be uneven. It is important to check the belt tension and adjust it as needed. It is also necessary to regularly clean the belt to ensure it is free of dirt and grease.
When checking the belt tension, it is important to remove any excess thread, dust, and dirt from the belt. The belt should be examined for any cracks or wear and the belt tension should be adjusted as needed. The belt tension should not be too tight; it should be adequate to enable the bobbin hook to rotate smoothly.
To adjust the belt tension, the belt should be loosened and tightened as needed with a screwdriver. The sewing machine should be tested after the belt tension has been adjusted to ensure the stitches are even. If the stitches are still uneven, the belt tension may need to be adjusted again until the desired results are achieved.
It is important to lubricate the drive belt on a regular basis. This will help to reduce friction and improve the performance of the sewing machine. It is best to use a sewing machine oil for this purpose. Applying the oil is straightforward; it is simply a matter of applying a few drops to the belt, massaging it in with a cloth, and then wiping it off with a clean cloth.
Check the Drive Motor
The drive motor is the component of a sewing machine that provides the power for it to run smoothly. It is important to check the condition of the motor regularly to ensure it is in good condition. If the motor is not working properly, it can cause the machine to run erratically.
To check the motor, it is important to first unplug the sewing machine and remove the cover of the motor. Once the cover is removed, the motor should be inspected for any damage, such as cracks or broken parts. If the motor appears to be in good condition, the motor should be tested by plugging the machine in and checking if it runs smoothly.
If the motor is not running smoothly, it is important to make sure all the wiring connections are intact and replace any faulty wires. The motor should also have enough lubrication; if not, oil should be added. Finally, it is important to check the wiring for signs of fraying or loose connections.
If the motor does not appear to be working properly, it is best to consult a professional. The motor should be serviced regularly, either at home or by a professional. Servicing the motor regularly will help to improve the performance of the machine and extend its life.
Check the Feed Dogs and Feet
The feed dogs and feet are essential components of the sewing machine; they are responsible for guiding the fabric along the right path. It is important to check the feed dogs and feet on a regular basis to ensure they are in good condition. If they are not, they can cause the sewing machine’s performance to suffer.
To check the feed dogs and feet, the cover of the machine should be removed and the feed dogs and feet should be examined. If they are bent, worn, or cracked, they should be replaced. It is also important to make sure the feed dogs and feed feet are sitting in their proper positions. If they are misaligned, this can affect the performance of the machine.
To adjust the position of the feed dogs and feet, the screws holding them in place should be loosened and the feed dogs and feet should be moved into the correct position. Once the feed dogs and feet are in the correct position, the screws should be tightened and the machine should be tested to ensure the stitches are even.
When replacing the feed dogs and feet, it is important to use parts that are made of high-quality materials. It is also wise to purchase parts that are specifically designed for the model of the sewing machine. This will help to ensure the performance of the machine is not compromised.
Regular Maintenance Tips
Regular maintenance is important to ensure the sewing machine is working properly. It is recommended to oil the machine on a regular basis, once every week or two. To oil the machine, the oil should be applied directly to the moving parts, such as the gears and shafts. Then, the oil should be spread over the parts with a clean cloth. Be sure to wipe off any excess oil.
In addition to regular oiling, it is also important to clean the machine regularly. This should be done every month or two, using a soft cloth, warm water, and a mild detergent. Once the machine is wiped down, it should be dried thoroughly to prevent rust and corrosion.
Finally, it is important to regularly check the machine for any loose parts, broken parts, and wear and tear. If any parts are found to be damaged or worn, they should be replaced immediately. Taking care of an old sewing machine is essential in order to ensure it is in good working condition and lasts for years to come.
