General Cleaning and Oiling of Sewing Machine
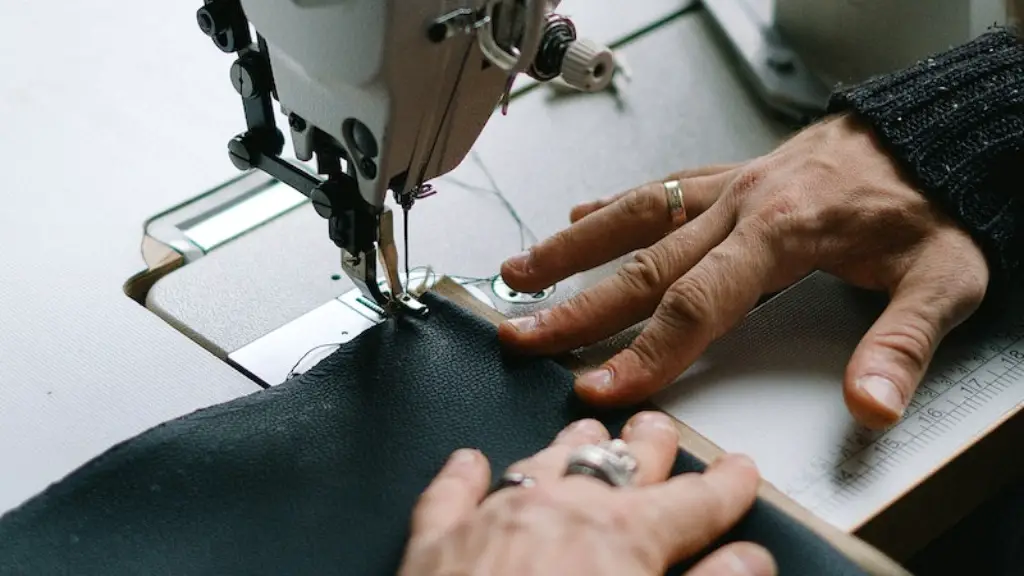
Using a sewing machine offers a great deal of convenience to anyone who needs to sew fabric. Problems with the stitching and tension can be frustrating, but generally arise from basic maintenance that is not performed regularly. Regular cleaning and oiling will keep the sewing machine functioning properly and ensure it lasts for as long as possible. In this article, we discuss the importance of performing regular maintenance on your Singer sewing machine and explain some of the steps you can take to accomplish this.
No matter how often it’s used, a sewing machine requires regular cleaning and oiling. If fabric dust and lint accumulates in the machine, then it’s likely to cause poor stitch quality, improper tension, and other problems. Dirt and debris can also damage the sewing machine itself if they are not cleaned regularly. Sewing machine manuals usually provide detailed instructions on how to clean and oil the machine, so always refer to your manual for this information.
Before starting to clean and oil your machine, unplug it, remove the needle and presser foot, and open up all the screws and remove the fabric from the bed. Use a soft, lint-free cloth to dust and wipe the surface, including the needle guard and shuttle hook. Make sure to check for the accumulation of lint or dirt particles between the gears, and clear away any accumulations that you may find.
Next, use a dropper or small syringe to fill the machine with oil. Singer recommends usingSinger machine oil for lubricating the parts that need it. If oiling is required, add a few drops of oil to all the parts and then turn the wheel of the sewing machine by hand, to distribute the oil evenly. Wipe away any excess oil that may come out during this process. In addition, leaving your machine unplugged while oiling will help to avoid any sudden movement that may result from the motor being switched on.
Finally, reassemble the sewing machine, and oil and clean the shuttle hook. Make sure to clean the shuttle hook thoroughly, as this is a particularly important step if it is stuck or not functioning correctly. You should also inspect the needle, presser foot, thread tension discs and other parts of the machine to make sure that they are working correctly. If you find any damaged parts, replace them with new ones.
Cleaning and oiling your Singer sewing machine on a regular basis will help keep your machine in top condition and minimize repair costs. If any major problems arise, take it to a professional machine technician for proper maintenance.
Cleaning the Bobbin Area
In a Singer machine, all of the moving parts are carefully shielded to keep dirt and dust particles away from the needles and other critical areas. However, the bobbin compartment is particularly vulnerable to lint accumulation, so it’s important to give it extra care when cleaning your Singer machine. Begin by first unplugging the machine and then removing the bobbin case.
Use a soft cloth to clean the outside area before turning your attention to the bobbin area. This is where you should focus the majority of your cleaning efforts. It’s important to properly remove any lint accumulations with a small brush, soft cloth, and tweezers. Once all the lint is completely removed, use a dropper to add a few drops of oil to all sides of the bobbin area.
Reinstall the bobbin case back into place and examine the entire structure. Add more drops of oil if needed and be sure to remove any excess oil with a dry cloth. Your machine is now clean and oiled, so it’s ready to sew again!
Maintaining the Hook Assembly
The hook assembly is the part of the machine that rotates while the machine is running, and it accumulates a lot of lint and dust over time. Therefore, cleaning and oiling this area is critical to maintaining the functioning of your machine. Start by removing the hook assembly and taking off the check springs, presser bar, and check arm. Clean the main hook area thoroughly before reinstalling the check arm, presser bar and check springs.
Once all the parts have been reassembled, inspect the fluttering paddle and make sure it is working properly. You should also check the tension spring and adjust it if needed. Simply use a small flat head screwdriver or tweezers to check the tension spring and make any adjustments. When finished,replace the hook assembly and make sure all the parts are securely in place.
It’s also important to remember to add a few drops of oil inside the hook race every time you clean and oil your machine. This will ensure that everything works smoothly and that lint build-up is prevented.
Maintenance Tips
Performing regular cleaning and oiling will help to keep your machine in tip-top shape. Here are a few maintenance tips you should keep in mind:
- Make sure to use the correct lubricating oil for your Singer machine. Singer oil is specifically designed for use with Singer machines and is available for purchase online.
- Always refer to your machine manual for specific instructions on how to clean and oil your machine.
- Always ensure that you have plenty of oil to lubricate your machine. Having the right amount of oil is essential to ensure the machine runs properly.
- Clean the needle, and other parts regularly, as this will help prevent any problems from occurring in the future.
- Make sure to unplug the machine before you start cleaning or oiling it. This will help prevent any accidents that may occur.
Additional Considerations
It’s also important to keep your sewing machine in a safe, dry and temperature controlled environment. Sewing machines should not be left in direct sunlight or exposed to extreme temperatures, as this can damage the machine and reduce its life span. Avoid storing your machine in a damp or humid location and make sure that the area is well ventilated, as this can also cause rust or condensation inside the machine.
Always make sure that the needle is properly in place and not bent or damaged in any way. If the needle is damaged, replace it with a new one as soon as possible. In addition, check the overall condition of your machine regularly, as this will help to identify any problems early on and reduce repair costs.
Avoding Common Mistakes
When it comes to cleaning and oiling your Singer sewing machine, some of the most common mistakes include over-oiling the machine, failing to remove all lint and dust build-up, and not lubricating specific areas of the machine. To avoid these mistakes, always follow your machine manual closely, use the correct type and amount of oil, and make sure to clean out all areas of the machine.
You should also take special care when dealing with delicate parts such as the tension discs, shuttle hook and needle guard. If any of these parts are not fitted correctly, the functioning of the machine could be impaired. Additionally, make sure to change the needle regularly as a worn-out needle will not only affect the quality of your stitching but can also damage the fabric you’re working with.
Conclusion
Regular cleaning and oiling of your Singer sewing machine will help to prevent it from malfunctioning and reduce repair costs. Knowing how to clean and oil your machine correctly is essential, as many problems are caused by neglect. Always refer to your machine manual and take special care of delicate parts such as the tension discs, shuttle hook and needle guard. Following these guidelines will help to keep your machine in top condition, so you can enjoy all that it has to offer!


