If you are an aspiring sewer, learning how to use a specific type of sewing machine can be daunting. The Janome sewing machine is well-known for its user- friendly instruction book and helpful guidance from the manufacturer’s website. One of the biggest attractions of the Janome sewing machine is that it comes preloaded with a wide array of stitches, which makes it easy for sewers to tackle a variety of projects. But do you know how to do a buttonhole on this type of machine?
In order to create a buttonhole on a Janome sewing machine, you’ll first need to select the specific stitch that you would like to use. The Janome sewing machine includes several buttonhole stitches, so you should be able to choose the one that most suits your needs. It’s important that you familiarize yourself with the function of each stitch beforehand, as each one requires a slightly different procedure to achieve the best results. Once you have selected the stitch, you will then need to adjust the settings on the machine to match the size of the buttonhole that you would like to create. This can be done manually or with the help of a stitch chart, which can be found on the manufacturer’s website.
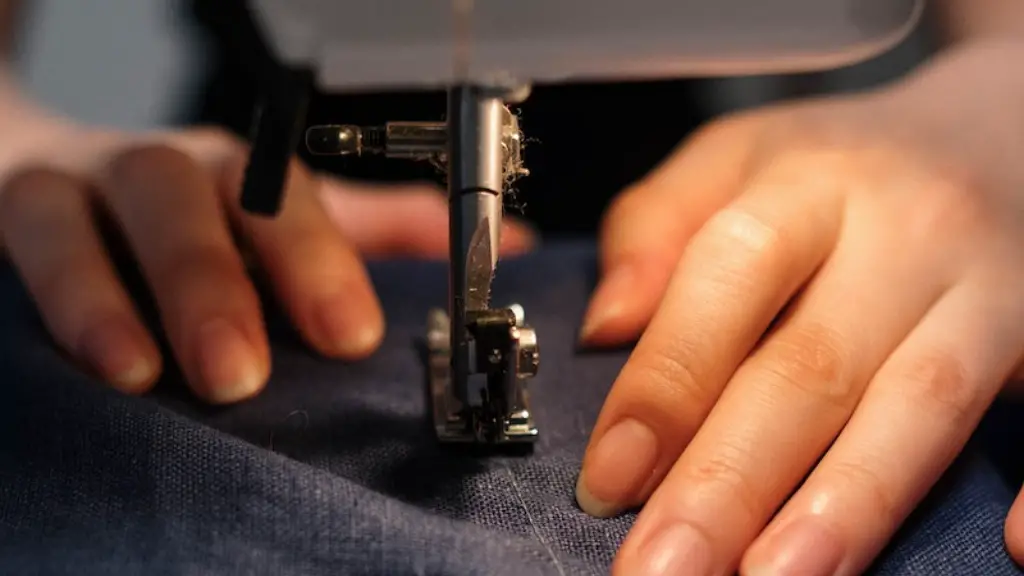
After making the necessary adjustments, it is now time to start sewing. Before beginning, ensure that your fabric is cut at the same size and measurement that your buttonhole will be. You can mark exactly where your buttonhole will be by using a fabric marker or chalk. This will ensure that your buttonhole is the exact size that you need. Begin sewing your buttonhole at the top of the fabric and work your way down by keeping the presser foot pressed against the fabric. Once you reach the bottom of the fabric, pause for a few seconds and then begin sewing to the left about one inch and release the presser foot before turning the fabric in a counter- clockwise direction. To avoid fabric puckering, keep your fabric flat during this process.
Once you have finished the stitching process and have gone all the way around the buttonhole, the next step is to cut open the center of the buttonhole. This can be done using a pair of sharp scissors or a seam ripper. When using a pair of scissors, be sure to take your time and go slowly, as cutting too quickly could potentially damage the fabric. Once you have made the cuts, you can then pull the buttonhole open by gently tugging on the fabric on either side of the buttonhole.
After opening your buttonhole, it is also important to secure the edges of the fabric so that it remains flat around the button. To do this, you will need to use a yarn or embroidery thread and a needle. Secure the thread to the fabric with a few small stitches, and then use a whip stitch to go around the outside edge of the buttonhole. Be careful not to make the stitches too tight, as this could cause the buttonhole to become distorted. After you have finished stitching, fasten off the yarn and tie a knot in the end to hold it in place. Finally, trim away any excess yarn or thread that is visible, and you are done!
Tips for Success
Making a perfect buttonhole is all about having the right tools and the right technique. It can be helpful to practice on a piece of scrap fabric before tackling a project on your real fabric so that you can get an idea of how the process works. It’s also important to take your time and be as precise as possible so that your buttonhole looks neat and professional. Finally, make sure to read the instructions that come with your Janome sewing machine carefully so that you are familiar with all the settings and functions of the machine.
Alternate Buttonhole Techniques
In addition to the traditional buttonhole technique outlined above, there are also other methods that some sewers prefer. For instance, if you do not want to use a yarn or embroidery thread to secure the edges of the buttonhole, you may be able to achieve a similar effect by using a zipper foot or a special buttonhole foot attachment. A zipper foot can be used to “stitch in the ditch” around the edge of the buttonhole, which will prevent unwanted puckering or bulging of the fabric. A special buttonhole foot, which is sold separately, can be used to stitch a buttonhole with a more finished look. No matter which method you choose, it is important to take your time and ensure that your stitches are as even as possible.
Avoiding Common Mistakes
When it comes to sewing a buttonhole, there are a few common mistakes that you should watch out for. One of the most common mistakes is stitching the buttonhole too tightly, which can cause the fabric to become distorted or even cause the button to pull through. Additionally, some sewers make the mistake of not cutting the center of the buttonhole open, which results in a hole that is too small for the button to fit through. Lastly, it is important to ensure that your buttonhole is placed in the correct spot on the fabric. Placing a buttonhole too far away from the edge of the fabric can cause your button to look awkward and off-centered.
Tips for Sewing Buttonholes on Thick Fabrics
Creating a buttonhole on a thick fabric can be a bit more challenging, so it’s important to take your time and be extra careful while sewing. This type of fabric is likely to require a stronger needle and thread, and you may also need to adjust the settings on your Janome sewing machine accordingly. Additionally, it is best to use a blunt needle for sewing on thicker fabrics as it won’t snag the fabric as easily.Finally, make sure to use an extra layer of stabilizer material to keep the fabric from stretching or bunching while stitching the buttonhole.
Troubleshooting
Sometimes, despite taking the necessary precautions, buttonholes can still turn out the wrong size or shape. This is typically the result of either a tight stitch or too small of a cut at the center of the buttonhole. To fix a tightly stitched buttonhole, try carefully picking out the stitches with a seam ripper. Alternatively, you can try cutting away the center of the buttonhole with a seam ripper and then try again. If your buttonhole is too small, simply cut away more fabric from the center to make it wider.
Sewing Buttons
After sewing your buttonhole, the final step is to add the button. To do this, you’ll need to use a needle and thread that matches the color of your fabric. Begin by threading your needle, and then slide it through the center of the buttonhole from one side to the other. Keep threading the needle through the hole from side to side until it is secure. Then, tie a knot in the end of the thread and cut off the excess, and your buttonhole is finished.
Avoiding Fraying
Fraying can be a big problem when sewing buttonholes, especially on lighter weight fabrics that can be easily pulled apart. To prevent fraying, you can use an adhesive stabilizer product which will help keep the fabric together while you sew. You can purchase a stabilizer at most fabric or craft stores, or you can make your own at home using a mixture of glue and water. Additionally, you can use a double needle or a special buttonhole foot to help keep the fabric from pulling apart.
Know the Difference
It’s important to note that some fabrics require a particular type of buttonhole, so it’s essential to pay attention to the fabric type and the type of stitch you choose before you begin. For instance, thicker fabrics such as denim may require a straight bar tack buttonhole, while lighter fabrics such as silk may require an Insert Buttonhole stitch. Depending on the type of fabric, you may also need to use a stronger needle, stronger thread, or a stabilizer product. Knowing the difference between the types of buttonholes, fabrics, and stitches can make the process of sewing a buttonhole much easier.


