PART 1: Oil Vintage Singer Sewing Machines
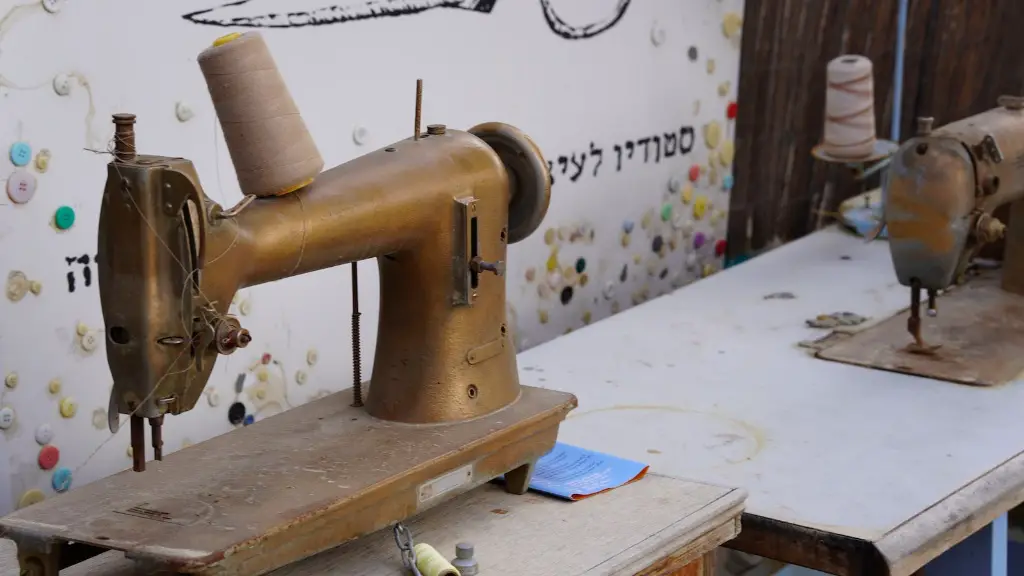
If you have recently purchased a vintage Singer sewing machine, then oiling is of utmost importance to ensure that your antique still runs as smoothly as it did when it first left the factory. But how should you go about oiling a vintage Singer sewing machine?
According to experts, oiling your venerable sewing machine is often the key to maintaining its functionality if the handwheel does not turn, if the presser foot does not move up and down, or if the needlebar does not move. Generally, use only special oil designed for sewing machines, as regular machine oil can be too hard and damage the machine.
It is not necessary to oil the sewing machine after each use. It should be oiled every month or so depending on the frequency at which it is used. It is recommended to oil the parts that are regularly used, such as the needles, shuttle, hooks and the bobbin case. Do not try to oil the belts, straps, and threads as this will only gum up your machine. But it is essential to oil the mechanisms that regulate the speed of the machine and the feed dogs.
Start by turning off the machine and unplugging it from the power supply. This is to prevent any accidents from occurring accidentally. Then take off the needle plate and check the shuttle race to identify any wear that needs to be lubricated. The next step is to open up the top cover of the machine and carefully oil the shuttle race, bobbin case, and the connecting rod.
After that, press the handwheel in a downward motion and rotate it four times to let the oil flow down through the foot of the machine and into the shuttle race. Utilise a clean, soft cloth and dip it into the oil before wiping the foot with the cloth. Next, locate the shuttle C-hook and the 4 thread guides before rubbing a few drops of oil on each of them.
Finally, use a damp cloth and rub it all over the machine, in order to remove any dust and dirt that have accumulated over time. Wipe the surface of the machine and its parts dry with another clean and dry cloth. This will ensure that the machine runs more smoothly and efficiently. Once you’re done, you should reassemble the various parts of the machine and test it out to ensure that everything works properly.
PART 2: Source for Special Oil
When it comes to the oil for use on vintage Singer sewing machines, it is best to source for special oil formulated especially for those machines. This kind of oil is more accessible compared to the regular machine oil and has been designed to lubricate parts of the machine specifically. Further, it is recommended to purchase oil that is already pre-diluted with alcohol, as these types of oil causes less buildup, are hypoallergenic, and are easier to clean off.
Although there are many places to purchase this kind of oil, it is important to find a reliable and trusted source. There are many online stores, such as Sewing Machines Plus, Singer, and Brother, that offer customised oils. Other options include local fabric stores or hobby stores. Once you have the oil, make sure to carefully read the label and user’s manual before use.
Lastly, there are special cleaners and waxes that may be necessary when oiling your vintage Singer sewing machine. Cleaners help remove stubborn dirt, lint, and other debris. Wax, on the other hand, aids in making sure that dirt does not accumulate and prevents additional wear and tear on the machine.
PART 3: Sewing Can Worsen Existing Conditions
In the interest of safety and comfort, there are certain conditions and existing health issues that one needs to be aware of before embarking on oiling a vintage Singer sewing machine. For example, those with arthritis in their hands or wrists may have difficulty in handling and operating the machine, potentially even worsening their symptoms.
In addition, improper posturing during the sewing process can lead to poor posture and cause fatigue or even joint pain in the long run. Hence, it is important to practice proper posture while sitting at the sewing machine and ensuring that your body is supported. Also, long periods of use may lead to headaches due to the eye strain.
Cleaning the machine regularly helps alleviate these issues. Removing any lint or debris between the moving parts guarantees a smooth operation as well as a more comfortable sewing experience. Taking breaks between sewing sessions also helps to improve alertness and reduce fatigue.
PART 4: Types of Oil
Oils designed specifically for Singer sewing machines generally come in either a light oil or a heavy oil. A light oil is preferable for maintaining the parts that regulate the machine speed and the feed dogs. For oiling the shuttle race, hook, and tension regulator, a heavy oil is usually used. A heavy oil helps to fill in any heavy wear and tear.
If a light oil is used for heavy wear, it will wear off quickly and need to be replaced. Alternatively, if a heavy oil is used on light wear, it will create too much build-up and cause more wear and tear than necessary. It is important to use the correct type of oil for the type of wear and tear. This will help ensure that your vintage Singer sewing machine continues to run smoothly and efficiently.
PART 5: Disassembling the Machine
In order to ensure proper oiling and maintenance of the machine, it may be necessary to disassemble it before starting the oiling process. First, check the manufacturer’s manual to check what tools you need and to make sure that you can safely and correctly take the machine apart. Then, take note of the order in which the parts were placed.
After that, start by taking off the needle plate and the machine screw. Then, remove the bobbin case, shuttle race, and the flywheel. You can then unscrew any other parts such as the tension regulator, presser foot and needle clamp. After that, carefully open up the top cover of the machine and gently remove the various parts.
Once you have disassembled the machine, you can then proceed to carefully oil the various parts of the vintage Singer sewing machine. Make sure to focus on the heavily used parts such as the shuttle race, flywheel, and the bobbin case. Also, remember to use a specific oil formulated for vintage Singer sewing machines for better results.
PART 6: Reassembling the Machine
When reassembling the vintage Singer sewing machine, keep in mind what order you took the parts in. Start by replacing the needle clamp, presser foot, and tension regulator. Then replace the flywheel, shuttle race, and bobbin case. Finally, use the machine screw and bolt to secure the needle plate and the top cover.
Test the machine to make sure that each part moves correctly. If some parts are still not functioning correctly, then you may need to adjust or replace some parts. The most important thing is to inspect the parts before reassembling the machine, to ensure that they are functioning as they should.
You can use a dry cloth to wipe down the machine side to side and up and down to make sure that all parts are clean and secure. Lastly, plug the machine into the power supply and test the machine. If it functions correctly, you have successfully reassembled the vintage Singer sewing machine and it is now ready for use.
PART 7: Maintaining the Machine
Maintaining a vintage Singer sewing machine requires regular cleaning and oiling to keep the machine running smoothly. Start by using a damp cloth to wipe down the exterior of the machine and its parts. Make sure to clean in the nooks and crannies to get rid of any dirt and lint.
It is best to oil the machine with a light oil at least once a month, depending on its use. Make sure to focus on the shuttle race, the bobbin case, and the connecting rod. Don’t forget to oil the mechanisms that regulate the speed of the machine and the feed dogs as well.
When not in use, make sure to unplug the power cable after each use. This will make sure that the machine does not accidentally start when not in use. It will also prevent any unexpected incidents from occurring. Lastly, make sure to keep the machine dust-free and secured in a safe place when it is not in use.
PART 8: Choosing the Right Needle
Apart from oiling, choosing the right needle for your vintage Singer sewing machine is essential for getting the best results. There are three main types of needles – regular needles, quilting needles, and embroidery needles. Each one of these needles is designed for specific tasks.
Regular needles are used for everyday sewing and are available in a variety of sizes; they are ideal for woven fabrics. A quilting needle is slightly heavier and has a larger eye and bigger groove. This type of needle is specifically used for quilting. Lastly, an embroidery needle has a larger eye and grove that allows the thread to slide through with ease.
When selecting the right needle for your vintage Singer sewing machine, always check the fabric type and project. Different fabrics require different size needles. For example, silk and polyester fabrics need a smaller needle while thicker materials such as denim and canvas require a stronger, larger needle. In general, selecting the correct needle for your project can equate to better results.
PART 9: Troubleshooting Common Problems
Despite your best efforts, if you encounter a common problem consistently, it is best to understand the underlying issue and to troubleshoot the problem accordingly. Common problems include needle breakage, thread jams, tension issues and stitch quality problems.
Needle breakage is a common issue, especially if you are not using the right needle. The thread may also jam due to lint or dirt buildup, or if the project requires too thick thread. Additionally, tensions surges can lead to stitch skipping and loose stitching. Therefore, ensure that the tensions are aligned correctly to minimise these problems.
Lastly, stitch quality problems can arise due to operator error or a defect in the machine. In this case, refer to the instruction manual and make sure that you are using the correct machine settings. If you are still having difficulty, contact the manufacturer for advice or repair service.
PART 10: Caring for Your Antique Sewing Machine
Caring for a vintage Singer sewing machine calls for regular oiling and cleaning, as well as savvy usage, appropriate tools and knowledge on common problems. Make sure to use special oil formulated for Singer sewing machines, as regular oil can damage the machine. Test out the machine after oiling, and use the right kind of needle for the fabric type.
It is also important to make sure that the machine is safe and securely stored when not in


