Part 1
Threading a sewing machine seems like a daunting task – but it doesn’t have to be! The truth is, anyone can thread a sewing machine in a few simple steps. With the correct threading and adjusting of tension, you can achieve beautiful, consistent stitches – and all in a fraction of the time.
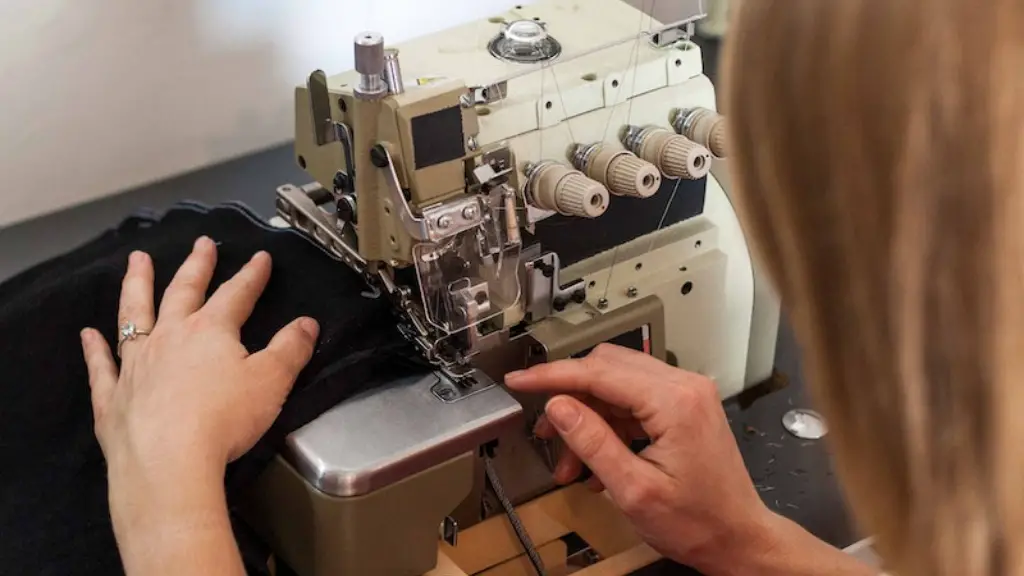
For start sewing with a sewing machine, the first step is to thread the machine. It looks complicated, but it only takes a few minutes and can be done with any machine, new or old. Before you begin, you will need thread in the appropriate type and size, a lint brush, and allen keys to loosen, move and tighten screws on the bobbin and needle plate.
The basic sequence of threading a standard sewing machine can be broken down into four steps:
Part 2
First Step – Selecting the Upper Thread
The first step in threading a sewing machine is to select the upper thread. Start by selecting the correct thread for the project. Generally, polyester or cotton thread is best for most types of fabrics. Coated polyester thread or heavy-duty polyester thread is also available and is great for upholstery projects, where extra strength is necessary. Follow the manufacturer’s instructions for selecting the correct thread for the fabric you’re using.
Next, attach the spool of thread to the spool holder on the machine. You may need to adjust the retaining nut on the spool holder to fit the spool of thread. When the spool of thread is firmly in place, cut a piece of thread around 12 inches long. This piece of thread is used to draw the thread through the slot in the machine.
Part 3
Second Step – Guide the Upper Thread
Next, draw the 12-inch piece of thread through the slot in the machine. Start by inserting the end of the thread into the thread slot. This is usually located on the top of the machine, but check the manual for instructions. If necessary, use a lint brush to remove any dust or lint from the thread slot.
Pull the thread gently but firmly through the slot, until the end is accessible from the front of the machine. This is important – make sure the thread is coming out of the correct thread slot for the type of fabric you’re using (the material slot for light fabrics, or the upper thread slot for heavier fabrics). It’s important to keep the thread taut during this process – if it’s too loose, it can be difficult to thread the machine.
Part 4
Third Step – Feed the Upper Thread
Once you’ve drawn the thread through the slot, guide it through the tension spring. This is the metal bar at the top of the machine, and it keeps the thread under tension. Simply pull the thread across the spring, being careful not to snag it.
Now, guide the thread through the plastic guide at the top of the machine. This is used to keep the thread in the right place and prevents it from getting tangled. Then, hold the thread firmly in your right hand and slide the thread guide up and down the right side of the machine. The thread should follow the shape of the guide as it moves up and down.
Part 5
Fourth Step – Attaching the Lower Thread
The next step is to attach the lower thread, or bobbin thread. For this, you will need to attach the bobbin to the machine. Place the bobbin into the machine and make sure it is seated properly. The bobbin should have a clear plastic bobbin case attached to it – this is what holds the thread in place.
Then, pull the lower thread down towards the bobbin case, and through the slot at the front of the machine. Check that the thread is coming through the correct slot for the type of fabric you are using. If necessary, loosen the bobbin case with an allen key to make sure the thread is coming through the right slot.
Next, add tension to the bobbin thread by pulling on the tail of the thread. The tension should be tight enough to keep the thread in place, but not so tight that it is difficult to turn the wheel.
Part 6
Final Step – Testing the Machine
Once the threads are attached, test the machine. Begin by pulling up the bobbin thread by turning the wheel away from you. Be careful not to over-turn the wheel, as this can cause the thread to tangle. Next, turn the wheel towards you, and check that the needle is going up and down correctly and the thread is looping correctly.
If the thread is not looping correctly, try adjusting the tension of both the upper thread and the bobbin thread. It’s important to ensure that the tension on both threads is even – too much tension can cause the thread to snap, while too little tension can cause the stitches to be uneven.
Finally, test the sewing machine by stitching a few test stitches on a scrap of fabric. This will give you an opportunity to double-check your machine and make any necessary adjustments.
Part 7
Caring for Your Sewing Machine
Once you’ve threaded your sewing machine, it’s important to take good care of it to ensure it works correctly. Start by cleaning the machine regularly – dust and lint can build up and affect the performance of the machine. The best way to do this is to use a lint brush or vacuum cleaner to remove any dust or lint.
You should also lubricate the moving parts of the machine. This will help keep the machine running smoothly and reduce the chance of excessive wear and tear. Use a light oil to lubricate the parts, and be careful not to use too much – a few drops should be enough.
Finally, make sure to check and replace the needle regularly. The needle is one of the most important parts of the machine, and a dull or bent needle will cause poor-quality stitches.
Part 8
Knowing the Basics
Threading a sewing machine is straightforward, but there are a few things to keep in mind. Before you start, make sure that you have the correct thread and supplies, and that you read the manufacturer’s instructions.
Be patient and take your time when threading the machine. If you rush, you may miss a step or make a mistake. Also, make sure to check the stitch quality regularly and make any necessary adjustments. With a little practice and patience, you will soon be threading your machine like a pro.
Part 9
Configuring Your Sewing Machine
In addition to setting up the sewing machine correctly, it’s important to configure the machine correctly for your project. This includes selecting the correct stitch type and tension, as well as adjusting the speed and thread tension.
The stitch type and tension settings can vary depending on the type of fabric you are using. For example, a light cotton fabric will require a smaller stitch and less tension than a heavier canvas fabric. Be sure to refer to the manufacturer’s instructions or consult a professional if you need help setting the correct tension and stitch type.
Finally, make sure to adjust the speed and thread tension appropriately. If the stitch speed is too slow, it can affect the quality of the stitches, while too much thread tension can cause the thread to snap.
Part 10
Troubleshooting Unfamiliar Machines
Although learning how to thread a sewing machine can be challenging, it’s a skill worth learning. This is especially true if you plan on using machines other than your own.
If you’re faced with an unfamiliar machine, don’t be afraid to ask the store assistant or owner for help. Most machines have instructions printed on the body of the machine, so be sure to read those before you start threading. Alternatively, you may be able to find instructions online – sites such as YouTube offer helpful tutorials for threading a range of different machines.
Remember, threading a sewing machine is not as complicated as it seems. With these simple steps, anyone can thread a sewing machine with ease.


