Troubleshooting Steps
Sewing machines offer convenience, but unfortunately, they can run into issues. Jamming is a common problem for sewers, often caused by the improper setup of the sewing machine. Before you take your sewing machine to a professional for service, here are some troubleshooting steps you can take to help diagnose and potentially fix the jamming of your machine.
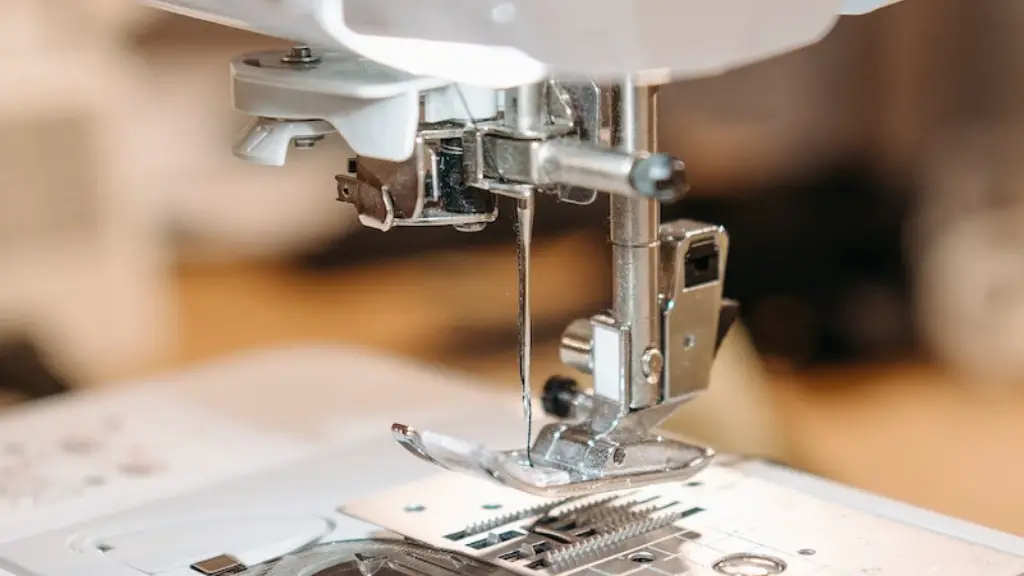
First, check the presser foot and check that it isn’t too high. The presser foot should be just slightly above the fabric. If it is too high, it could cause the fabric to be blocked or jammed the needle or feed dogs. To fix this issue, use the dial or lever on the top of the machine to lower the presser foot. You can also raise the needle to its highest position and gently remove the fabric from the presser foot.
Second, if the needle isn’t coming up through the fabric after the stitch is complete, check the bobbin case to make sure it is positioned correctly. The bobbin case should be placed correctly with the notch lined up with the release plate. You should also check that the bobbin is threaded correctly and the thread is not caught or tangled.
Third, make sure that the needle is correctly inserted. Ensure that the flat side of the needle is facing the back of the machine. The needle should also be the right size and style for the fabric and thread you are using. Using a needle that is too thick or too thin could cause the needle to bend or break.
Finally, if you are using an accompanying table, ensure that it is properly secured to the machine. The table should fit flush against the machine, and any brackets should be tightened firmly. Additionally, check that the screws that hold the table to the machine aren’t loose or missing.
If these troubleshooting steps don’t solve the jamming problem, your machine may need to be serviced or repaired by a professional. Taking your machine in for service can help identify and address any more serious mechanical issues that may be causing the jamming.
Common Causes
Jamming is a common issue with sewing machines, and there are a few common causes of this issue. One of the most common causes of jamming is thread jamming, which occurs when the thread becomes tangled or knotted on the fabric. Thread jamming can be caused by knots in the thread, incorrect thread tension, or improper positioning of the thread.
Another common cause of jamming is incorrect needle size. A needle with a large eye can cause the needle chamber to become clogged with thread, leading to fabric jamming. Additionally, a needle that is too thick or too thin can cause the needle to bend or break, leading to jamming.
Another cause of jamming is poor lubrication. If the sewing machine is not properly lubricated, the friction between the moving parts can lead to fabric jamming. As a result, it is important to oil the machine regularly to prevent jamming.
Finally, improper threading is another common cause of fabric jamming. If the machine is not threaded correctly, the fabric can get stuck in the needle chamber, leading to jamming.
Tips for Avoiding Jamming
Preventing fabric jams should be a priority for sewers to ensure a successful sewing project. Here are some tips to help you avoid fabric jammings and ensure your sewing machine runs smoothly.
First, start by ensuring that you are using the right needle size and style. Check the manufacturer’s instructions to ensure that you are using the correct needle size and style. Additionally, make sure that the needle is correctly inserted, with the flat side of the needle facing the back of the machine.
Second, make sure that you are using the correct thread for the fabric. Thread that is too thick or too thin for the fabric can cause jams in the needle chamber. The thread should also be kept taut throughout the sewing process to avoid thread jams.
Third, make sure that the presser foot is set at the correct height. The presser foot should be just slightly above the fabric, and if it is too high, it can cause the fabric to be blocked or jammed.
Fourth, make sure that your machine is properly lubricated. Refer to the manufacturer’s instructions to determine how often you should oil your machine, and make sure to use the correct type of oil.
Finally, make sure that you are threading your machine correctly. Refer to the manufacturer’s instructions to ensure that you are threading your machine correctly, as improper threading can lead to fabric jams.
DIY Repairs
If your sewing machine is jamming due to a mechanical issue, there are some repairs that you can do yourself before taking your machine in for professional service. Here are some repairs that you can do yourself to troubleshoot and potentially fix the jamming of your machine.
First, check the feed dogs for lint or debris. The feed dogs are the small teeth that move the fabric through the machine. If the feed dogs are clogged with lint or debris, they may not be able to move the fabric properly, leading to jamming. To clean the feed dogs, use a brush or vacuum to remove any lint or debris.
Second, check the tension disc and make sure that it is tightened correctly. If the tension disc is too loose or too tight, the machine may not be able to hold the thread properly, leading to thread jamming. To correct this, loosen or tighten the tension disc until the thread tension is correct.
Third, check the timing of the machine. If the timing of the machine is off, the needle may not be able to stitch through the fabric properly, leading to fabric jams. To check the timing, use a timing tool to check the needle and feed dogs. If the timing is off, you may need to take your machine to a professional for service.
Regular Maintenance
Regular maintenance is essential to ensure that your machine runs smoothly and prevent fabric jams. Here are some maintenance tips to help you keep your machine clean and running smoothly.
First, clean the presser foot and needle plate. These components tend to accumulate lint and thread, which can lead to blocked needles or jammed fabric. To clean the presser foot, use a vacuum or brush to remove any lint or debris, and use a soft cloth to wipe down the needle plate.
Second, clean the feed dogs. Over time, the feed dogs can accumulate lint and thread, leading to fabric jams. To clean the feed dogs, use a brush or vacuum to remove any lint or debris.
Third, oil the machine regularly. Depending on the machine, you may need to oil the machine every few months. Refer to the manufacturer’s instructions to determine how often you should oil your machine, and make sure to use the correct type of oil.
Finally, check for broken or bent needles. Over time, needles can become bent or broken, leading to fabric jams. Before each sewing project, check the needle to make sure it is not bent or broken and replace it if necessary.
Replacement Parts
If your machine is not working properly, you may need to replace some parts to fix it. Here are some common parts that you may need to replace if your machine is experiencing jamming.
First, the needle may need to be replaced if it is bent or broken. Additionally, if the eye of the needle is too large, it may cause the needle chamber to become clogged with thread, leading to fabric jamming.
Second, if the timing of the machine is off, you may need to replace the timing belt or gears. If the timing is off, the needle will not be able to stitch through the fabric properly, leading to fabric jams.
Third, if the thread is tangling or knotting, you may need to replace the threader. The threader is the small arm that feeds the thread through the machine, and over time it can become worn or broken.
Finally, if your machine is jammed due to a mechanical issue, you may need to replace the moving parts. If any of the moving parts are worn or broken, it can lead to fabric jams.
Professional Service
If you have tried troubleshooting and repairs and your machine is still jamming, it may need to be serviced or repaired by a professional. Taking your machine in for service can help identify and address any mechanical issues that may be causing the jamming.
When taking your machine in for service, make sure to bring the manual so the technician can identify the issue. Additionally, be sure to explain the issue to the technician in detail so they can properly diagnose the problem.
Professional services will generally include a general cleaning, lubrication, and testing of the machine. During the service, the technician may need to replace worn or broken parts, so be sure to ask what parts they will need to replace and how much they will charge for the service.
Finally, after the service is complete, make sure to test the machine to ensure that the issue has been resolved. If the jamming persists, you may need to try a different professional or take the machine in for a more comprehensive service.
