Instructions
Adjusting the tension on a sewing machine is vital to ensure that the fabric pieces are properly sewn together. Depending on the type of fabric and thread that is being used, the tension settings may need to be tweaked to make sure the finished product is of the highest quality. To make sure the tension settings are correct, this article will discuss how to adjust upper tension on a sewing machine.
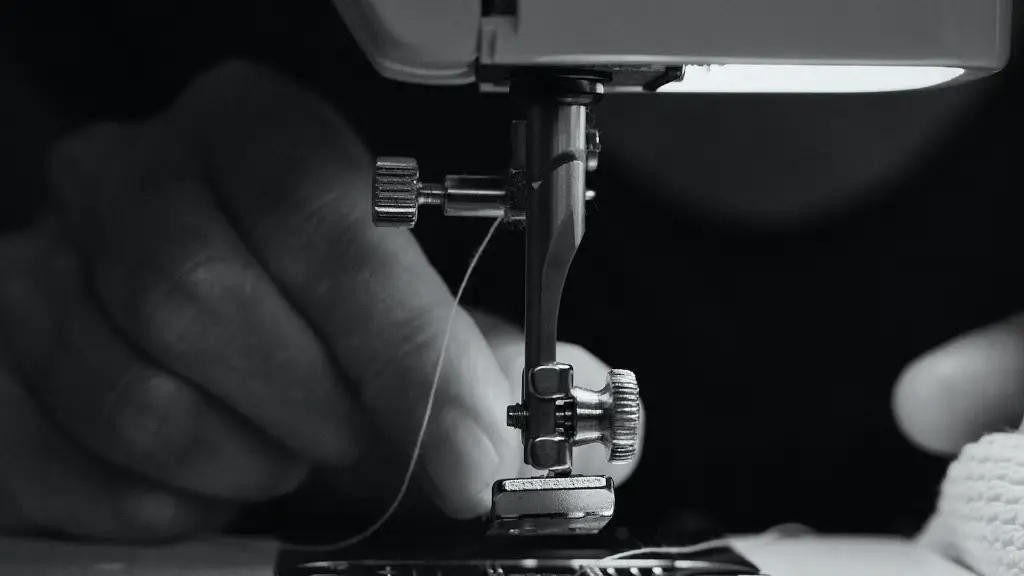
At the heart of any sewing machine is the tension system. This system comprises of several components, such as the thread spool, the tension disks, and the tension regulator. With a few simple steps, the user can adjust the tension on the sewing machine for a wide variety of fabrics and threads. Firstly, the user must ensure that the thread spool is in the correct position and the thread is properly aligned with the tension regulator.
Next, the user must check the tension regulator and adjust the tension disks if necessary. In many sewing machines, the tension disk is a numbered dial and is located on the top of the machine, either near the thread spool or the tension regulator. By turning the dial, the user can adjust the upper tension on the sewing machine. The user should generally start with the lowest number on the dial, and slowly increase the tension until the fabric is stitched together properly. It is important to note that the ideal tension setting may differ depending on the fabric, thread, and type of sewing machine.
In addition to adjusting the tension disks, it is also important to be mindful of the thread that is being used. High-quality thread can make a big difference when it comes to tension settings. Using thicker thread will require higher tension while thinner thread will need less tension. Therefore, it is important to select the right type of thread for the fabric being used so the upper tension settings can be adjusted accordingly.
In order to check if the upper tension is adjusted correctly, the user should take a short piece of fabric and sew a test line. If the stitches are even and smooth, the user can assume that the upper tension was correctly adjusted. However, if the stitches are too tight or too loose, this indicates that the tension disk may need to be adjusted further.
While adjusting the tension of a sewing machine can seem intimidating at first, following these steps can help make the process easier. Adjusting the tension on a sewing machine is essential for producing high-quality stitched fabric pieces, so it is important to take the time to make sure the tension is adjusted correctly.
Troubleshooting
Sometimes even after adjusting the tension correctly, there may still be issues with the fabric stitching. In this case, it is important to troubleshoot the problem to ensure that the issue is resolved quickly. Firstly, the user should check the needle to make sure it is the right size and shape for the fabric that is being used. Next, the user should ensure that there is enough thread in the bobbin and that it is threaded correctly.
Next, the user should check the thread to make sure it is unwinding properly from the spool and that it is passing through the tension disks and the tension regulator without any tangles. If any of these components are not functioning properly, the user should replace or adjust them accordingly. Additionally, the user should check if the needle is properly inserted in the machine as this could also be causing issues with the stitching of the fabric.
Finally, the user should check the tension again to make sure it is set correctly. If the tension is set too high or too low, the fabric will not stitch together properly. If the tension is adjusted properly but the issue persists, then the user may need to consult a sewing machine technician for further assistance.
Stitch Length
In addition to adjusting the upper tension, users also need to ensure that the stitch length is set correctly. The stitch length will depend on the fabric being used as well as the type of stitch that is desired. If the fabric is heavy, then a longer stitch is recommended while a shorter stitch is better for lightweight fabrics.
The user can adjust the stitch length by turning the knob on the side of the machine. This knob will often have a range of numbers which indicate the stitch length, with lower numbers meaning a shorter stitch and higher numbers meaning a longer stitch.
Additionally, if a specific type of stitch is desired (such as a zigzag or decorative stitch), the user must check the manual of the sewing machine to find out how to select a specific stitch. This process will vary from sewing machine to sewing machine, so it is important to read the manual before changing any settings.
Presser Feet
The presser feet play an important role when it comes to adjusting the upper tension on a sewing machine. The presser feet should be checked regularly to make sure they are in the proper position and are working correctly. If the presser feet are not properly aligned or are not working properly, then the tension settings may need to be adjusted accordingly.
A good rule of thumb is to ensure that the presser feet are firmly pressing down on the fabric so that the fabric moves smoothly under the presser foot. This will ensure that the tension is even and that the fabric is being fed into the machine properly. Additionally, the user should also check if the presser feet are properly adjusted on the machine as this will also have an effect on the tension settings.
Lubrication
Regular lubrication of a sewing machine is critical for ensuring that the tension settings are correct. The user should regularly oil the tension disks and other components of the sewing machine to make sure everything is working properly. This will prolong the life of the machine as well as help ensure that the tension settings are accurate.
In addition to regular lubrication, it is also important to clean the sewing machine regularly. Dust and lint can accumulate in the tension disks and other components of the sewing machine, which can lead to inaccurate tension settings. Therefore, it is important to make sure that the machine is clean and properly oiled so the tension settings are correct.
Sewing tips
Once the user knows how to adjust the upper tension on the sewing machine and adjust the other settings correctly, it is important to remember to follow a few general tips when sewing. Firstly, the user should take their time when stitching the fabric and avoid rushing as this can lead to inaccurate tension settings and uneven stitching.
In addition, the user should use sharp needles as dull needles are more likely to cause snags and pulls in the fabric. Lastly, when changing threads and fabrics, it is important to adjust the tension accordingly. That way, the tension settings will always be accurate and the user will produce high-quality stitched fabric pieces.
Fabric Selection
In addition to adjusting the tension settings correctly, it is also important to make sure that the fabric being used is appropriate for the project. Some fabrics such as cotton and linen will require different tension settings than heavier fabrics such as denim. Additionally, stretchy fabrics such as jersey and lycra may require additional tension because of their elasticity. Therefore, it is important to select the right type of fabric for the project and adjust the tension accordingly.
It is also important to make sure that the fabric is cut correctly. If the fabric is cut unevenly, then the tension will be off, resulting in an uneven stitched product. Therefore, it is important to make sure that the fabric is cut properly based on the pattern before stitching to ensure the tension settings are correct.
Furthermore, different fabrics will also require different types of needles and threads. For example, heavier fabrics such as denim will require thicker needles and threads while light fabrics such as muslin will require thinner needles and threads. Therefore, the user should use the right type of needle and thread to ensure the tension settings are accurate.
Interfacing
Interfacing can also have an effect on the tension settings. Interfacing is a type of fabric that is placed between the fabric layers to provide shape and structure. Depending on the type of interfacing that is being used, the tension settings may need to be adjusted accordingly. For example, fusible interfacing will require higher tension settings than regular interfacing.
Additionally, when using interfacing, the user may need to press the fabric to ensure that the interfacing is securely attached to the fabric. If the fabric is not pressed correctly, then the tension settings may not be correct, resulting in an uneven stitched product. Therefore, it is important to press the fabric properly to make sure the tension settings are correct.
Finally, when using interfacing, the user should also pay attention to the thread used for stitching. Interfacing can be quite thick and if the threads used are too thin, then the interfacing may not be attached securely. Therefore, it is important to select the right type of thread when stitching fabrics with interfacing to ensure the tension settings are accurate.
