Sewing machines can be incredibly handy if you’re a crafter or simply like taking on quick DIY projects. Once you learn how to sew, your options for projects will be nearly endless. One of the most important parts of owning a sewing machine is understanding how to install the presser foot.
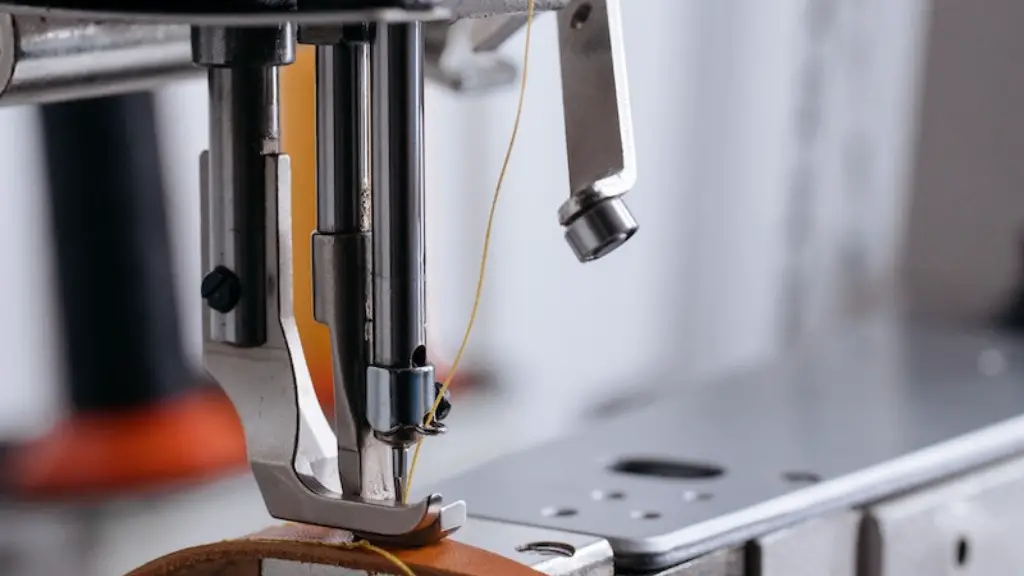
A presser foot is a metal device that fits onto the arm of your sewing machine. It helps keep the fabric in place while you sew and prevents it from moving. Depending on the type of foot you have, it can also help you sew different types of stitches and seams. Knowing how to install a presser foot on a sewing machine is essential to being able to sew properly.
Understand the Different Types of Presser Feet
Before you can successfully install a presser foot, you’ll need to understand the different types. A standard presser foot is an all-purpose foot used for most basic sewing techniques. Different manufacturers have their own standard foot design, so you’ll need to purchase the correct one for your machine. If you’re doing more involved work, you might like to consider using a specialty foot. A specialty foot is designed for specific tasks, such as making a piping foot or a quilting foot.
Loosen the Screw
In order to install the presser foot onto your machine, you’ll need to start by loosening the screw on the arm of your machine. Don’t remove the screw entirely; just make sure it can move freely. Once it’s loosened, you can lift up the arm of the machine and slide the presser foot into the area where the screw was located. Make sure the foot is centered, and then tighten the screw again securely.
Check the Lever
Some sewing machines have a lever that you need to adjust in order for the foot to work properly. The lever should click into place once it’s been adjusted and the foot should now be able to move freely. Sometimes the lever will lock the foot in place, and you’ll need to disengage the lever to be able to remove the foot in the future.
Safety Tips
When installing a presser foot, it’s important to remember to use safety protocols. Always unplug your machine before adjusting parts on it. It’s always a good idea to use protective tools such as rubber gloves and safety goggles. If you don’t feel comfortable installing the presser foot on your own, seek help from an experienced technician.
Keep the Foot Clean
Once you’ve installed the presser foot and you’ve begun sewing, it’s important to remember to keep the foot clean. Depending on the type of fabric you’re working with, bits of fabric can slowly build up on the foot, making it difficult for you to work properly. Cleaning off the foot after each use can help ensure that it operates and functions properly.
Choose the Right Stitch Type
Different presser feet are better for different types of stitches and fabrics. To get the best results from your sewing machine, make sure you’re using the right foot for the job. Research before you start may help you save time and hassle when it comes to selecting the right stitch type.
Check the Pressure Adjustment
The pressure of the presser foot is a particularly important setting to review. If your machine has an adjustable pressure setting, make sure it’s set properly for your project. Too much pressure and the material won’t move freely through the machine. Too little pressure and the fabric won’t stay in one place.
Caring For Your Machine After Installation
Once you’ve finished installing the presser foot and you’ve begun sewing, there are a few maintenance tasks you should remember to complete. Regular oiling of the machine is important to keep it in top condition and lubricated properly. Make sure to read the user manual for your machine for the recommended oiling schedule. You’ll also want to clean the machine regularly and replace the needle often.
Learning How To Sew
Knowing how to sew is essential for making the most out of your sewing machine. Beginner sewing classes or video tutorials can provide you with the information you need to learn basic techniques. You’ll want to start by practicing simple stitches and build up to more advanced techniques. As your skills improve, you’ll be able to explore projects that use a variety of presser feet.
Choosing the Right Fabric
Before beginning a project, make sure you’re using the right fabric for the job. Different fabrics require different presser feet and stitches to make sure they look their best. Cotton fabrics are often best for practical projects, while silk and velvet are better suited to loose, casual designs.
Practice Makes Perfect
When starting out, it’s normal for projects to not turn out exactly as planned. The more you practice with different fabrics and presser feet, the more you’ll be able to find the best way to sew based on your needs. Be patient and experiment with different fabrics, stitches and styles until you find the one that’s right for you.
Knowing the Best Condition For Sewing
When setting up to start sewing, it’s important to be aware of the best environment for your work. If you’re sewing outdoors, make sure there’s no wind or direct sunlight that can damage the fabric. Make sure the floor is clean and free from dust and debris. Inside, make sure the room you’re sewing in is free from pets and any other obstruction that can interfere with your project.
Knowing How To Store Your Sewing Machine
When you’re finished with a project, be sure to store your machine appropriately to ensure its longevity. Keep it stored in its own case with a lid to protect it from dust and debris. You can use a damp cloth to clean the surface of the machine and make sure to store your extra accessories such as buttons and bobbins in a separate area.
Caring For Your Finished Projects
When sewing projects, you’ll want to take special care to make sure they last as long as possible. Read the care instructions for each fabric you use and follow them carefully. If possible, hand wash darker fabrics and use mild detergents when possible. Once you’ve cleaned the fabric, be sure to hang or lay the project out flat to dry and avoid using heat sources to speed up the process.
Know When to Replace Your Presser Foot
Having a good quality presser foot can make a huge difference in the quality of your work. However, eventually even the best presser foot will need to be replaced. If you notice that your presser foot is not working as it should or it has become bent or worn, you’ll need to replace it with a new one.
Conclusion
Installing a presser foot on a sewing machine is an essential part of the sewing process. Knowing how to properly install the foot and use it correctly can save a lot of time and hassle. With the right tools and materials, anyone can learn how to sew. With a bit of practice and attention to detail, you’ll soon be conquering any project with ease.
