Materials Required
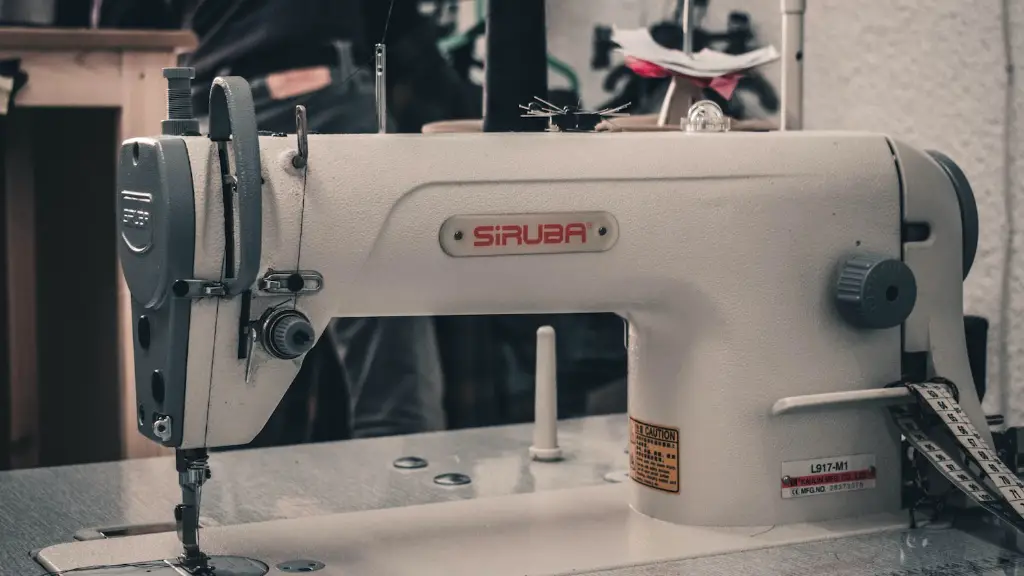
When crafting a pair of pants with a sewing machine, having the right materials is essential. For starters, you’ll need a pair of existing pants to use as a template or guide. This will help you get the right dimensions, such as waist size and inseam length. In terms of fabric, you’ll need two metres of medium weight cotton or cotton blend fabric. You’ll also need a matching thread, a fabric pen, scissors, a needle, and a few pins. As with all tasks related to a sewing machine, it’s important to make sure everything is in working order. Make sure your needle is sharp and your sewing machine is threaded properly.
Lay Out Your Fabric
Before you begin, you’ll need to lay out and cut your fabric. Place the fabric on a flat surface, wrong side facing up, and fold it in half lengthwise. With your existing pants as a template or guide, lay them on top of the fabric, making sure to match both sides. Pin the pants to the fabric with a few pins so they don’t slip out of place. Once the pants are properly pinned, trace the outline of the pants with your fabric pen. Once you have traced the outline of the pants, cut along the fabric pen line. Make sure you cut extra fabric at the seams for hems, pocket pieces, and any other areas that need extra fabric.
Sewing the Pieces Together
Once all of your pieces are cut, you can start sewing them together. Begin by matching the front pieces of your pants. With the right sides of the fabric facing each other, stitch along the sides and crotch. Make sure to back-stitch when you start and finish your seams. Next, you’ll need to attach the back pieces to the front of the pants. With the right sides of the fabric facing each other, pin the back pieces to the front and stitch along the sides, waistline, and crotch. Be sure to add a zipper or some type of closure mechanism to the front of your pants.
Adding Pockets
When adding pockets, make sure you pin them to the right side of the fabric. Once you have the pockets in place, stitch along the edges. When you’re done, cut the excess fabric around the edges. For a neat finish, you can topstitch the pocket edges.
Adds Trim
If you’d like a fancier look for your pants, you can add trims, tassels, or other designs. With your fabric pen, trace the outline of where you’d like the trim to be, then sew it on. Just make sure the trim isn’t too bulky and the stitching isn’t too tight since the fabric needs to be able to move.
Finish the Seams
Once all the pieces are sewn together and the trim is added, you can finish the seams. To do this, fold them over and press them down before stitching. This is where an iron and ironing board come in handy. When it comes to the hems, you can fold the fabric up by an inch or two and press it before stitching. This will give you a neater finish and ensure your pants stay in place.
Try on the Pants
Now, it’s time to try on the pants and make sure they fit. Putting on the pants will also help you see which areas need more adjustment or where the fit may be a little off. If this is the case, take the pants off and make any adjustments, then try them on again until you get the desired fit.
What To Consider When Buying Fabric
When buying fabric for a pair of pants, make sure it is of good quality and is comfortable to wear. Look for fabric blends such as cotton and spandex that will help the fabric move with your body. Also, look for fabric that won’t wrinkle easily or fade in colour. Experts recommend looking for fabrics that have been pre-washed or pre-shrunk to ensure proper fit once the garment is made.
Tools and Accessories Needed
In addition to your sewing machine, you’ll need other tools and accessories to make a pair of pants. Clips, pins, tape measures, and seam rippers are essential for any sewing project. Further, an overlock machine is great for finishing off garment edges. You’ll also want a “set square” or “L-square” to mark perfect right angles when cutting the fabric. Lastly, purchase a marking pen or cloth that can easily be removed. A pinking shear will help cut selvage edges without leaving any marks.
How To Sew A Perfect Seam
Sewing a perfect seam is essential for any pair of pants. Start by using the right thread color for the fabric. It’s important to use the same color for the top and bobbin threads for the best results. Also, use the correct size needle for the material you are using. Make sure to determine the seam allowances for the pattern you are using before you start stitching. Follow the pattern’s instructions regarding seam allowances and use pins to keep the fabric in place while sewing. When you start sewing, keep the fabric taut and guide the fabric slowly with your hands. Sew slowly and use an even stitch length and tension.
Why Use A Zipper or Button Closure
Adding a zipper or button closure to the front of your pants will add a polished look and help keep your pants secure. A zipper also helps you get a snug fit. Make sure to use a size of zipper or button appropriate for the fabric and thickness of the fabric. If you’re using a button, choose one that has a flat back or flat-head design to ensure it doesn’t stick out or create an unsightly bulge.
Tools and Tips For Hemming
Hemming is an essential step in creating the perfect pair of pants. To do this, use a pair of shears to trim the edges at the hemline. Then, fold up the edges and press them down. If you’d like to add extra durability, use a blind hem foot or gimp foot to sew the hemline in place. Once the hem is done, you can use pinking shears to finish it off. This will help keep the fabric from fraying and unraveling.
How To Add a Waistband
Add a waistband for a tailored look to your pants. To do this, cut a strip of fabric that’s a few inches wide and a few inches longer than your waist measurement. Fold the strip in half lengthwise and press it with an iron. Then, fold it in half again, press it down, and sew the ends together to form a circle. To attach the waistband, align the right side of the waistband with the right side of the pants, and sew the waistband to the pants.
Take Your Measurements
When making pants with a sewing machine, it’s important to take accurate measurements. Take your waist, hip, thigh, and inseam measurements with a measuring tape. This will help ensure your pants fit properly, and that you don’t end up with a baggy pair of pants or too tight of a waistband. Not taking your measurements can lead to an ill-fitting pair of pants, so it’s best to measure twice and cut once.
Select the Right Thread and Needle
The last step is to select the correct thread and needle for the fabric, pattern, and stitch type. For pants, experts recommend using heavier weight thread. When it comes to the needle, use a size that is appropriate for the fabric and the type of stitches you will be using. A standard needle size for medium weight fabric is a size 80/12. If you’re working with a heavier weight fabric, you can use a size 90/14 needle. When in doubt, consult the manufacturer’s instructions for your machine.


