As an avid sewer, you understand the importance of maintaining and properly caring for a sewing machine. While many experienced sewers do not need to be educated on the importance of oiling a machine, many novice sewers become overwhelmed and confused when they try to oil a sewing machine. Knowing the best ways to oil a sewing machine can not only save you time and frustration, but it can also help to protect your machine from wear and tear that could lead to costly repair bills.
When it comes to oiling a sewing machine, there are some basics that all sewers should understand and be aware of. For starters, it is important to know what kind of oil to use for the task. Unfortunately, many people make the mistake of using motor oil or some other type of oil that is not specifically formulated for use on a sewing machine. Sewing machine oil, however, is specifically designed for use on the mechanical pieces of a sewing machine and can not only help to keep it running smoother, but can also help to prolong the life of the machine.
Regular sewing machine maintenance, oiling included, should take place every six to eight weeks. During this maintenance routine, a sewer should check the needle, hook and feed as well as replenish the oil. Depending on the type of sewing machine in use, oil should be applied to different areas of the machine and it is always better to oil around where the problem is occurring. This can help you to reduce the amount of oil that you need to use and make sure that the problem is taken care of right away.
Oiling a sewing machine should always be done carefully and cautiously. Over-oiling can cause seepage into the parts of the machine which could potentially damage it or cause it to run inefficiently. For this reason, it is important to be very careful not to over-oil your sewing machine. Experienced sewers recommend that only a light drop of oil be applied to each area that needs oil. Additionally, it is important to use a soft cloth or another protective layer when oiling the machine to help prevent the oil from seeping into any other components of the machine.
Sewing machine oil is considered non-toxc, however, it is very important never to get oil on your fabrics as it can cause spots or staining. Furthermore, using too much oil can cause your machine to become sluggish and clog up the thread, which will then require professional cleaning. To help prevent this from happening, experienced sewers suggest wiping off any extra oil in the area after oiling.
In addition to oiling the machine, it is also important to keep the machine clean. Dirt, lint and other debris can get caught up in the bobbin mechanism or other parts of the machine which could potentially damage the sewing machine if not properly taken care of. A good rule of thumb is to regularly remove any lint or threads that have gathered around the bobbin case and other areas using a dental pick or small brush. Sewers should also avoid using aerosol sprays and cleaning agents when they clean the machine, as the chemicals may damage the plastic parts and rubber seals in the machine.
Inserting a Bobbin
Before being able to start a project, a sewer must also know how to insert a bobbin into his or her sewing machine. Most sewing machines have a compartment located on the side of the machine that holds the bobbin. To put the bobbin in its slot, start by winding the thread around the bobbin clockwise and applying tension until the bobbin is completely wound. It is important to remember to use the same type of thread as the one used on the sewing machine’s upper thread, as different types of thread can cause the machine to jam or break the thread.
Once the bobbin is wound correctly, it is important to insert it into the bobbin case. There are two types of bobbin cases: the manual bobbin case, which must be manually inserted into the machine, and the automatic bobbin case, which has a tongue that must be aligned with a slot in the bobbin case. With the correct type of bobbin case, simply insert the bobbin case into the machine and make sure that it turns freely.
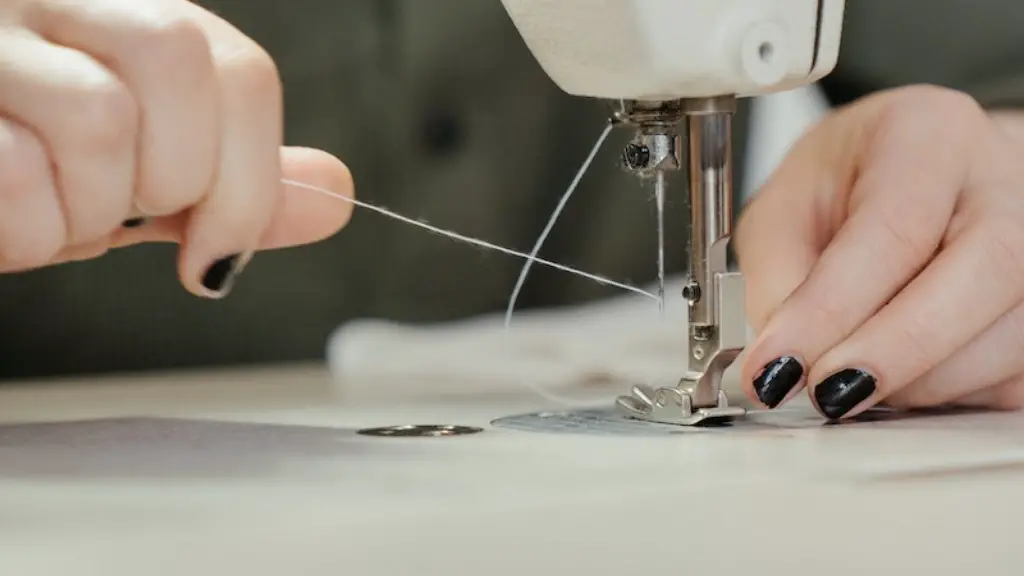
Once the bobbin is in place, the final step is to thread the needle and upper thread. Insert the thread into the eye of the needle, pull the thread all the way through and then insert the thread into the take-up lever. Next, turn the hand wheel counterclockwise until the needle is in its lowest position and pass the thread behind the bobbin case tension spring, which can be easily identified by its metal disc shape and colored spring.
After the thread is passed through the tension spring, wind the thread around the tension spring and insert it through the guide loop. Then wrap the thread around the bobbin in the same direction and pull it to the front of the bobbin case. Finally, slip the thread into the slot located inside the bobbin case and draw the thread out.
Thread Tension
Thread tension is an important factor to consider when oiling a sewing machine and can make a huge difference when it comes to creating quality stitching. If the thread tension is too tight, the stitches will pull and the fabric may bunch up. If the thread tension is too light, the stitches will be loose and the seams may not be strong. To properly set the thread tension, turn the dial to a midpoint setting and adjust as needed.
If you experience loose or tight stitching while sewing, try increasing or decreasing the tension in small increments to find the correct tension. Additionally, experienced sewers suggest experimenting with different types and weights of thread to find the ideal combination that works with your machine and the project. Different fabrics and types of thread will require different settings so the ideal tension will vary accordingly.
To determine if the tension is correct, try running a test stitch onto a piece of scrap fabric. Once the stitch is done, inspect it to see if the top and bottom thread interlock properly. If not, make slight adjustments to the thread tension until the stitch is perfect. Additionally, if the thread keeps breaking or the fabric seems to be bunching up, try loosening the tension before trying to adjust it further.
When it comes to oiling your sewing machine, it is good practice to inspect it on a regular basis to ensure that all of the moving parts are adequately lubricated. Additionally, it is important to read the user manual so you understand the specific ways that the machine should be lubricated. With care, regular maintenance and the right oil, you can make sure your sewing machine runs smoothly so you can keep creating quality projects.
Checking the Bobbin
In addition to regularly oiling your machine, it is important to check the bobbin to make sure that everything is running properly. Before you start a project, make sure to check the bobbin for any signs of wear and tear. This includes checking for any loops of thread that are attaching the bobbin to the body of the machine. If any thread is visible, the bobbin should be replaced.
Additionally, check the bobbin after a few stitches have been completed. If the upper thread and the bobbin thread are intertwining correctly and the stitch looks secure, then your bobbin is properly set. But if you find that the upper thread and bobbin thread are separating or the stitch is loose, this could indicate that the bobbin is not set correctly.
It is also important to make sure that the bobbin is wound correctly. Improperly wound bobbins can create problems with the stitching such as loose stitches and thread breakage. To make sure your bobbins are wound correctly, refer to the user manual to ensure that the bobbin is inserted into the bobbin case properly. Additionally, ensure that the thread is wound on the bobbin in the same direction that the bobbin will rotate when the machine is running.
If your machine is still having problems after checking the bobbin, you may need to adjust the bobbin tension. If this is the case, take the bobbin out of the machine and adjust the tension. Again, refer to the user manual to determine the correct tension for your machine, as each machine is different.
Replacing the Needle
Regularly replacing the sewing machine’s needle is also essential in order to ensure your machine runs without issue. According to experienced sewers, needles should typically be replaced every six to eight hours of use, depending on the material being stitched and if the machine is used often.
To start the process, ensure that your machine is turned off and unplugged before you begin. Next, select the correct needle for your project, as different fabrics require different needles and sizes. Be sure to double check the needle’s size and make sure it is appropriate for the fabric you are working with.
Remove the old needle from the machine by loosening the needle clamp screw located to the left of the needle with the removal tool provided with the machine. After the old needle is removed, insert the new needle into the needle clamp and tighten it. Turn the hand wheel counterclockwise to make sure the needle is placed correctly in the clamp and tighten the needle securely.
It is important to make sure the needle is inserted properly and that the flat side is facing the back of the machine. This will ensure that your needle does not break or snag on the fabric during stitching. Additionally, make sure the needle is secure by turning the hand wheel and observing the needle.
Inspecting the Machine
In addition to oiling and maintaining your sewing machine, it is important to thoroughly inspect the machine on a regular basis. Inspect the hook mechanism under a bright light to check for dirt, lint or other debris. If any debris is spotted, remove it with a brush or other soft tool. Additionally, inspect the needle to make sure it is still intact, as any chips or burrs can tear and damage the fabric.
It is also important to check the tension of all of the moving parts in the machine, such as the hook and feed, to ensure that everything is working correctly. Additionally, apply a few drops of oil to both the hook and feed mechanisms and make sure that the oil is distributed evenly.
Finally, inspect the power cord for any fraying or signs of wear and tear. If anything appears to be wrong, stop using the machine and take it to a qualified technician for further inspection and repair.
