1. Fundamentals of Sewing Machines
Sewing machines are a convenient and popular tool for both beginning and experienced seamstresses and tailors. They allow for steady, even stitching with less effort than hand sewing, and provide a wide range of customization options from basic decorative embroidery to intricate quilt designs. As with any skill, proper operation and care are essential for long-term success.
2. Setting Up Your Machine
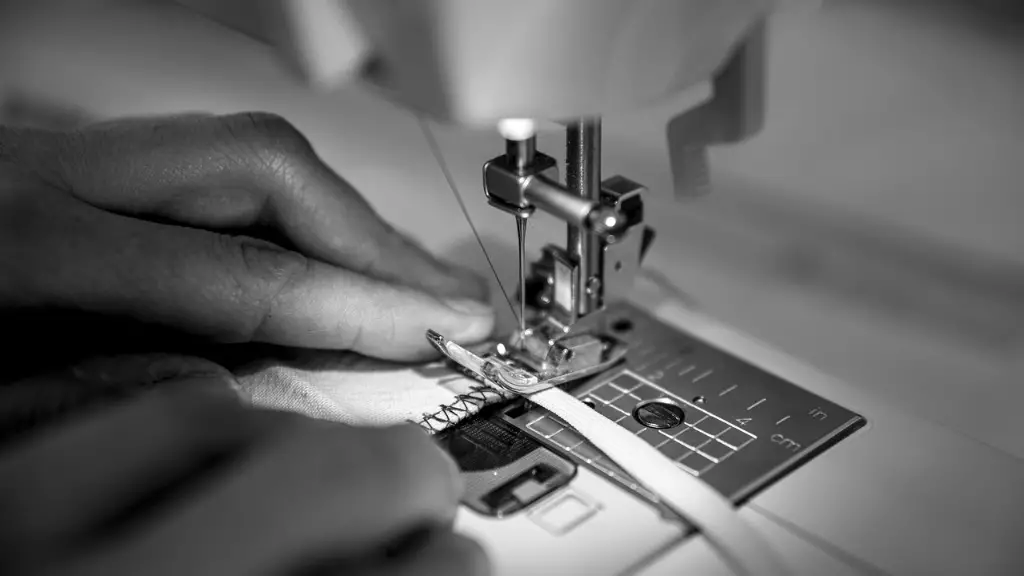
Before operating your sewing machine, you should ensure that it is correctly set up. With the feed dogs in the raised position and the needle at the highest point of its travel, start by threading the machine. Most machines have a system of grooves and tension discs that will guide you through the process. Begin by threading the upper thread through the tension discs, then bring it up through the needle, and finally thread it through the take-up lever. After completing the threading process, attach your presser foot and secure it with a screw.
3. Proper Thread Tension
To get the most out of your machine, you’ll need to set the tension so that the upper and lower threads form a secure lock. The machine should be set to a medium tension, which is usually achieved by adjusting the tension knob. Generally, the higher the number, the higher the tension. As a rule of thumb, you should set the tension to the manufacturer-recommended setting for the material being sewn. However, if the tension is unsatisfactory, it can be further adjusted according to the type of stitch you’re using and the fabric.
4. Understanding the Different Stitches
When using a sewing machine, it’s important to familiarize yourself with the different types of stitches and their specific uses. A straight stitch is used for most general sewing, while a zigzag stitch is used to join fabrics securely and add some decorative flair. A triple stitch is similar to a zigzag stitch but uses three threads instead of two, which makes it more secure. A blind stitch is used to attach fabrics invisibly, while an overlock stitch is used for hemming and for securing seams.
5. Needle Placement and Pacing
When sewing, correct needle placement and pacing are key. To ensure that the needle is correctly positioned, press the pedal firmly and steady the fabric with your free hand. When sewing a straight line, draw a guideline with a chalk pencil to ensure an even result. Pacing is equally important; the speed of the machine should be consistent, especially when making tight turns or working on delicate fabrics. If you find yourself moving too quickly, focus on your breathing and practice deep, steady breaths.
6. Finishing Touches
Once you’ve finished stitching your piece, you will need to remove the upper thread and lower thread. To do this, place the needle in the down position and raise the presser foot, then take the loose end of the upper thread and pull it gently to the bottom. Once the needle is in the up position again, repeat the process with the lower thread. Finally, check for any loose threads or knots, and trim them away.
7. Changing Bobbins and Presser Feet
In order to use different stitching techniques, you may need to use various bobbins, presser feet, and accessories. To change the bobbin, first raise the presser foot and, using your right hand, press the small lever beneath the needle, reverse the direction and then lift the bobbin holder. To replace the bobbin, simply insert the new one in the same manner and reverse the direction of the needle mechanism. Presser feet can be changed by pressing the release lever and lifting the foot.
8. Maintaining the Machine
It’s essential to keep your sewing machine in good working order. Regular maintenance can prolong the life of the machine and help to maintain its accuracy. To clean your machine, use a cotton swab and alcohol to remove built-up threads and lint from the inside of the machine. Be sure to inspect the hook and bobbin case for any damage and to check the needle for breaks or dull edges.
9. Troubleshooting
If you encounter any issues when working with your machine, there are a few easy troubleshooting steps you can take. For example, if there are skipped stitches, check the needle size, thread tension, type of fabric, and setting of the presser foot. If the seams are too tight, try reducing the tension or using a different stitch type. If the seams won’t stay straight, make sure the feed dogs are in the up position and that the fabric is not too loose.
10. Advanced Techniques
Once you’ve mastered the basics of operating a sewing machine, you can begin to explore more advanced techniques. There are an array of stitches and features that can be used to achieve a range of effects, from cording and smocking to gathering and pintucks. With practice and patience, you can use your sewing machine to create unique and beautiful projects.
11. Machine Embroidery
Machine embroidery is a popular and versatile way to add a designer touch to any project. From simple monograms to elaborate designs, machine embroidery can be used to create eye-catching pieces. To begin, make sure that your embroidery design is compatible with your machine, and then follow the instructions provided by the manufacturer. There are also a variety of software programs and accessories available that can be used to make custom designs.
12. Quilting Basics
Quilting is a great way to express creativity and add a personal touch to your projects. To start, you’ll need to select your fabric, batting, and quilting thread, and then use a ruler and rotary cutter to cut the fabrics into pieces. Next, arrange the pieces according to your design and use safety pins to hold them in place. Finally, begin stitching, using either a free-motion quilting technique or a walking foot.
13. Sewing With Knits
Knit fabrics can be tricky to work with, as they are prone to stretching and slipping. A few simple tips can help to ensure success. Start by selecting a ballpoint needle, which will help to avoid damaging the fabric. When stitching, use a zigzag or triple stitch, as this will provide flexibility and prevent the seams from breaking. Use a walking foot and ensure that the fabric is properly positioned. Finally, test the seams by stretching them gently before trimming the excess thread.
14. Working With Leather
Leather can add a luxurious touch to clothing, accessories, and home decor. When sewing leather, choose a heavy-duty machine with a powerful motor and a feed dog designed for handling thicker materials. It is also important to use a leather needle, as this will help to prevent the fabric from tearing. Finally, use a walking foot and choose a waxed polyester thread, as this will reduce fraying.


