How to Properly Thread a Sewing Machine
Knowing how to thread your sewing machine correctly is the first step to successful sewing projects. First-time sewers usually find learning how to thread difficult, but with careful instruction, understanding the various pieces of the machine and some practice, learning how to thread a sewing machine can be easy and rewarding.
Before starting to thread your sewing machine, it is important to be familiar with all of the machine’s parts. Knowing the different pieces of the machine and their functions is the best way to make sure your sewing machine is properly threaded.
Steps to Threading a Sewing Machine
When threading a sewing machine, there are two main parts of the machine that should be threaded: the bobbin and the main thread tensioner. The bobbin is the small, usually round or oval, plastic or metal spool that holds the thread. This thread needs to be passed through the tensioner, the part of the machine that controls the pressure of the thread.
To thread the sewing machine, start by inserting the bobbin into its designated space. Depending on the model of your sewing machine, this space may be on the side, the bottom or the top of the machine. The tensioner should then be threaded by pulling the thread from the bobbin through the tensioner. To ensure the thread is properly threaded, check that the thread has been pulled all the way through the tensioner and that nothing is blocking it.
Next, check the tensioner wheels of your machine. Most machines have multiple wheels that need to be turned in order to properly adjust the thread tension. Most machines have two tensioner wheels, one on the outside of the machine and one on the inside. The exterior wheel should be turned clockwise while the interior wheel should be turned counter-clockwise. When turning the wheels, make sure to turn them slowly and evenly.
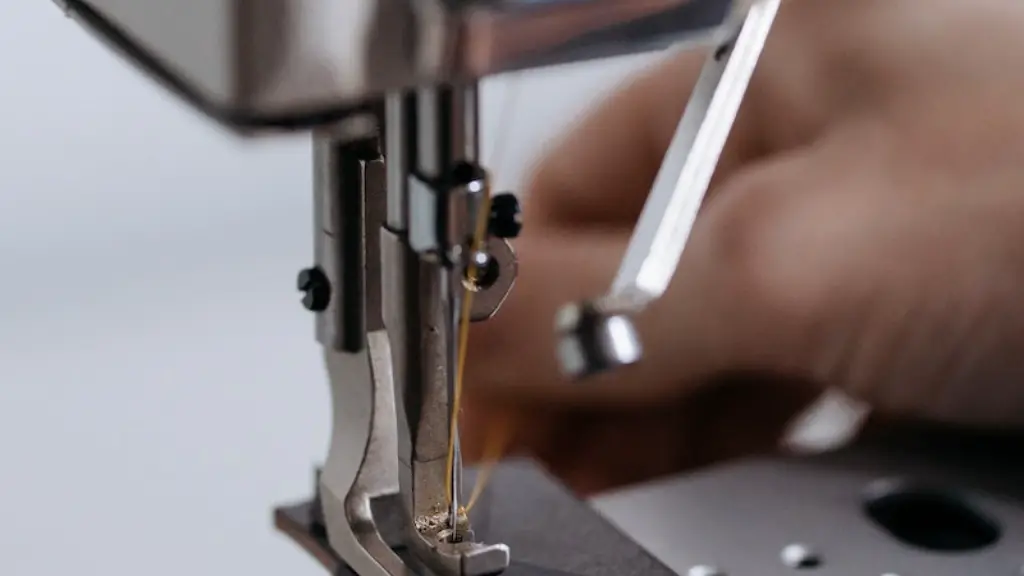
Once both the bobbin and the tensioner are threaded and tension is adjusted, the thread can then be passed through the needle. Thread the top of the thread through the needle and then pull it down through the needle’s eye. This will pull the thread through the machine and into the feeder.
After the needle is threaded, check that the tension is even and if everything is properly threaded. To do this, turn the hand wheel (the wheel closest to the needle) to push the needle down and then pull it up. As the needle moves, the thread should move with it.
Tips for Threading a Sewing Machine
When threading a sewing machine, there are few tips to keep in mind that can make the process easier. One tip is to not use thread that is too thin for the needle. If the thread is too thin, it may not stay in the tensioner correctly and can cause the needle to break.
Another tip when threading a sewing machine is to not overtighten the thread. When the thread is too tight, it can cause the machine to skip stitches. It is important to adjust the thread tensioner until the thread is neither too tight nor too loose.
Finally, it is important to use quality thread. While the quality of the thread may not affect the sewing machine’s performance, it can affect the final product. Quality thread is easier to thread and can ensure that the final product is of the highest quality.
Tools for Threading a Sewing Machine
When threading a sewing machine, there are a few tools that can make it easier. A needle threader is one of the most necessary tools for threading. A needle threader is a small device with several parts: a hook, a rod and a spring. The hook should be opened, then inserted into the needle’s eye and the rod should be turned to open the hook further and pull the thread into the needle.
A seam ripper is also useful when threading a sewing machine. Seam rippers are used to cut away unwanted seams and threads. They come in a variety of sizes and shapes and can be very helpful when threading a sewing machine.
Another helpful tool is a seam gauge. Seam gauges are small tools used to measure seams and hems. They can be used to check that the thread has been threaded properly and that the tension is even.
Threading a Sewing Machine: Troubleshooting
Threading a sewing machine correctly is essential in order to ensure that the machine is running properly and that the final product is of the highest quality. However, sometimes a machine can still have problems even after it has been threaded correctly. If a sewing machine is having problems, there are a few steps that can be taken to help troubleshoot and fix the machine.
If your sewing machine is skipping stitches, check that the thread tension is even. Most machines have two or more tensioner wheels that must be adjusted correctly in order to maintain even tension. If the thread tension is uneven, it can cause the machine to skip stitches.
If the machine is having trouble picking up the bobbin thread, make sure the needle is in the highest position. In some machines, the needle must be in the highest position for the bobbin thread to be picked up. Also, make sure the bobbin case is inserted properly into its designated space, as this can affect whether or not the machine will pick up the bobbin thread.
If the thread is jamming in the machine, make sure to check for any knots in the thread. If knots are present, they can cause the thread to jam in the machine. Also, make sure to check that the thread is not too thick for the needle. If the thread is too thick, this can also cause it to jam in the machine.
Clean Your Sewing Machine
Before threading a sewing machine, it is important to make sure that the machine is clean. Over time, lint and dust can build up in the machine and this can affect its performance. Before every sewing project, make sure to clean the machine and remove any lint or dust buildup.
When cleaning the machine, start by brushing away any lint and dust from the inside and outside of the machine. If a vacuum cleaner is available, use it to clean out the bobbin case and any other crevices. It is also important to clean out the feed dogs and make sure that they are not clogged with lint.
Next, use a soft cloth to gently wipe down the exterior of the machine. Make sure to avoid using any chemical cleaners or solvents as these can damage the machine. Finally, it is important to oil the machine before every use. Most machines will come with their own oil, so be sure to check the instruction manual for any specific instructions.
Tension Troubleshooting
If the thread tension is uneven or the stitches are not uniform, this usually means that the tension needs to be adjusted. To adjust the tension, first identify which thread is producing the uneven stitches. If it is the main thread, turn the tensioner wheel clockwise to increase the tension or counter-clockwise to reduce it. If the bobbin thread is uneven, turn the exterior tensioner wheel clockwise to increase the tension or counter-clockwise to reduce it.
It is also important to check if the thread is the correct type for the job. If the thread is too thick or too thin, it can cause the stitches to not be even or consistent. In addition, make sure the needle is properly sized for the thread being used; if the needle is too small, the thread can get caught in the needle and cause the tension to be uneven.
Finally, make sure the machine is well oiled and that the bobbin case is functioning correctly. A malfunctioning bobbin case can cause the stitches to be uneven or the thread to break. Make sure the bobbin case is turning freely and the thread is not caught or tangled on the case.
Threading a Sewing Machine with Ease
Learning how to thread a sewing machine correctly can be easy and rewarding as long as one knows the different parts of the machine and has the right tools. Taking the time to learn how to thread the machine properly can save time and effort in the long run and can ensure that projects turn out the way they should. With practice, threading a sewing machine can become second nature and can be done with ease and confidence.
