Sewing machines are a fundamental tool for a range of creative projects. Learning how to put in new thread can provide the user with confidence in managing a variety of garment and home furnishing projects. There are three main components in setting up a machine, selecting the thread, threading the machine, and winding the bobbin. This article will cover each step to ensure proper threading for the next exciting project.
Selecting the Thread
Prior to threading the sewing machine, it is important to select an appropriate thread for the project. Determine the type and weight of fabric for the project. Make sure the thread type, weight, and size are suited for the fabric being used. For instance, a larger or thicker thread may be used for heavier fabrics, and a thinner thread for lighter fabrics. Also choose an appropriate color for the fabric being used. Using a matching color will provide a neater finished result.
Many machine needles are labeled with a number. For example, a size 8 needle would typically use a 40 weight thread, and a size 12 needle would use a 30 weight thread. Selecting the right needle and thread will reduce future complications in the project. Be sure to check the thread regularly to ensure that the thread is free of knots, snarls, or other issues that may affect the quality of the sewing.
Threads that are wound loosely will cause the stitches to become uneven or have skipped stitches. Look for threads with even tension throughout the thread. Test the stretch of the thread, similar to that of a guitar string, for a consistent stitch length. This flexibility ensures the thread will move smoothly through the material being sewn.
Threading the Machine
The steps for threading a machine will vary depending on the machine used. Most machines have a diagram at the front or side of the machine that identifies each step. For those with electronic sewing machines, refer to the manual for additional information on specific threading requirements.
For manual machines, begin by threading the upper needle first. This can easily be done by holding the end of the thread and pulling it through the thread guides. Just above the stitch plate is the take-up lever, draw the thread up toward this lever. Place a spool of thread on the spool pin and pull out a length to the left of the machine. Thread the thread behind the lower thread guide and then up through the tension disc. Pull the thread toward the take-up lever, through the take-up lever hole and down toward the right, toward the needle.
To thread the lower needle, also known as the bobbin case, draw out a length of thread from the spool. Place the bobbin on the bobbin winder, making sure the thread is tight around it. Then, draw the remaining thread from the needle to the rear of the machine, to the bobbin case. Loop the thread around the tension disc from the top and bottom. Follow the thread guide up and around the bobbin before threading it through the bobbin case.
Winding the Bobbin
Before winding the bobbin, place the bobbin on the bobbin winder. Pull a length of thread toward the right, toward the bobbin. Push the bobbin winder over to the right and onto the needle plate, just above the stitch plate. Pull the thread through the bobbin winder slot and press the foot pedal. This will rotate the bobbin and wind the thread onto it. When enough thread has been wound, press the foot pedal up to engage the bobbin winder, then lift the bobbin case latch. This will release the bobbin and remove it from the winder.
Finally, re-attach the bobbin case to the winding on the left side of the machine. Pull the thread toward the right, over the top of the bobbin and behind the bobbin case notch. Re-engage the latch and pull out a 4” piece of thread. The bobbin is now ready to use.
Troubleshooting and Choosing the Best Thread
If the thread is looping or forming knots on the underside of the fabric, check the tension dial to ensure that it is even on both sides. Unthread and re-thread the machine for best results. When using an embroidery machine, using a stabilizer will help the project hold its shape and prevent the thread from becoming tangled.
When choosing thread there are additional factors to consider. Threads can be either synthetic or natural, depending on the project. Natural fibers such as cotton, linen and silk are often used for garments, while synthetic fibers such as rayon, polyester, and nylon are used for decorative stitching and embroidery. Each thread will have unique properties and will require additional attention when winding and threading.
Tips on Cutting and Taking Care of Threads
Start each project with a fresh thread spool, make sure the thread is unwound smoothly and always use the correct type of thread. Cut the thread at an angle, this will help prevent it from unraveling and make it easier to insert into the guides. Be sure to double knot the loose ends of the thread when working to prevent the thread from slipping out of the fabric.
By taking care to use the right type of thread and threading the machine correctly, the user will be able to enjoy successful projects with ease. Before starting each new project it is important to review the thread selection, threading and winding instructions.
Difference between Nylon and Polyester Threads
Both nylon and polyester are synthetic fibers. When choosing between the two types of thread, consider the properties that make each type unique.
Polyester is a more durable thread than nylon, though it will be less stretchy. Polyester is colorfast, making it the best choice when working with garments and colorful fabrics. Nylon is more flexible and less likely to break when sewing faster or using a heavier stitch. It is best suited for projects in light fabrics, heirloom projects, sheer fabrics and finer hand embroidery.
Using a Thread Conditioner
When working with difficult projects, a thread conditioner may be used. Thread conditioners are chemical treatments that help the thread move through the fabric more easily, reduce the amount of thread breakage, and reduce the wear on the machine. Simply dip the thread spool in a thread conditioner and let the thread dry for a minimum of two hours before threading the machine.
Before using any type of thread conditioner, read the manufacturer’s instructions to make sure it is compatible with the machine being used. Thread conditioner can help reduce any extra friction caused when sewing.
Maintaining the Sewing Machine
To get the best out of a new thread and the machine, frequent maintenance is important. When re-threading the machine, clean out the lint and other particles that can easily accumulate. Also clean the machine after each use by wiping off all surfaces, as this will help ensure a trouble-free and safe operation.
Be sure to change the needle regularly to ensure the highest quality of stitches. Needles will wear down over time and will affect the thread and fabric. It is good practice to change the needle for each new project. Use a needle appropriate for the fabric and thread being used.
Caring for Thimbles and Finger Guards
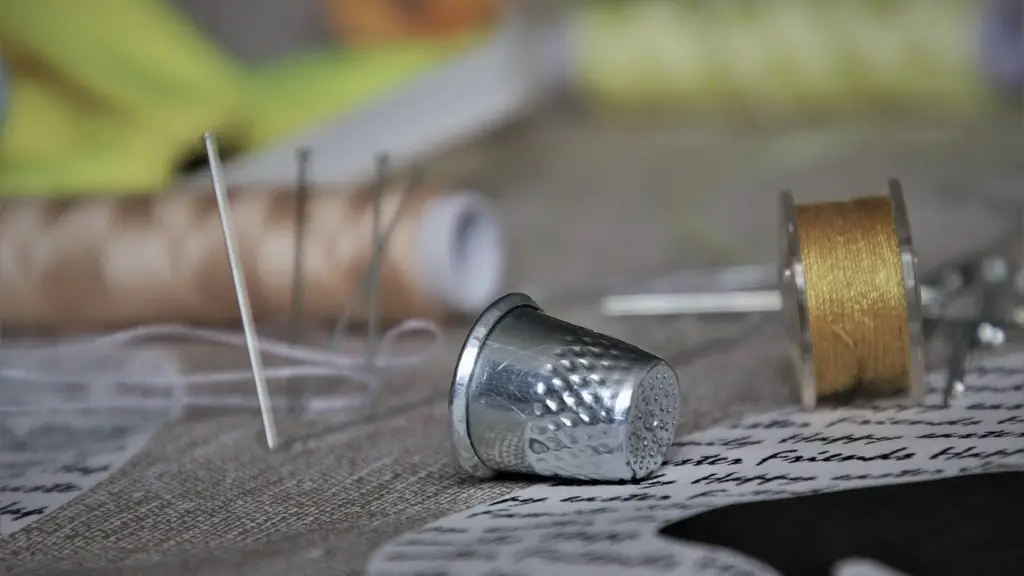
When sewing, a thimble can provide additional protection from cuts and needle punctures on the fingers. First, determine the size of thimble that fits the finger comfortably. Once chosen, maintain the thimble in a dry place, avoiding contact with any chemical cleaners.
Finger guards can also provide extra safety when sewing. Finger guards are placed over the needle head of the machine, with a punching needle that goes through and through the fabric, to prevent accidental stitches. While finger guards provide extra protection, they may slow down the process as the user needs to manually push the guard away from the needle.
Tips for Removing Thread from the Sewing Machine
In some cases the thread may become tangled or knotted while sewing, making removal difficult. One way to speed up this process is to remove the spool of thread, as well as any bobbins that may be attached. Then, detach the needle plate, the thread should come out of the machine more easily.
If thread remains knotted, take out any remaining thread. Removing thread with a crochet hook, or a lint brush, may be easier. Once all thread has been removed, rethread the machine and start the next project.
Storing the Thread
When not in use, thread should be stored in a dry area, away from dust, dirt, and direct sunlight. Accessible storage, such as a thread storage box is recommended. This will keep the thread clean and ready for the next project.
By following these steps, the user will have an easier time setting up the machine for each new project. Proper thread selection and care will ensure a successful sewing experience.
