Have you ever wanted to learn how to quilt a blanket with a sewing machine? Quilting has a long, distinguished history, and creating something with your own hands is a timeless way to express creativity and pride. Quilting involves sewing layers of fabric together, usually in a geometric pattern, to form a complete piece of artwork. While quilting used to be a time-intensive, hand-sewn art form, those looking to create a quilt can now do so using the convenience and speed of a modern sewing machine.
Whether you are looking to make a quilt out of recycled items from thrift stores or quilt kits with pre-cut pieces, here are some tips for successful quilting with a sewing machine.
Prepare Sewing Machine for Quilting
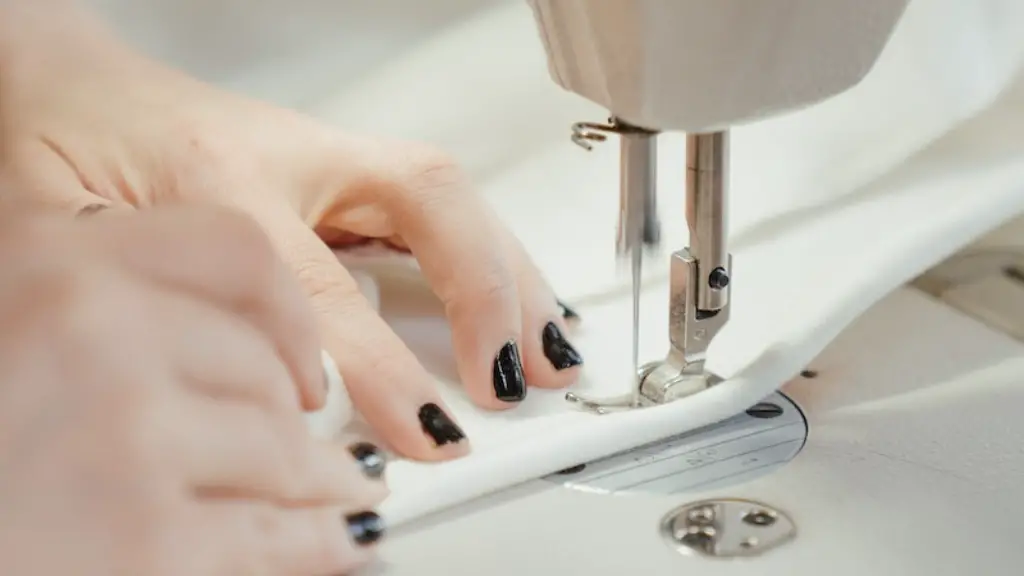
Before you begin quilting, you should check that your sewing machine is in proper working order. Change the presser foot of your machine to one with a greater surface area that can make the most of quilt piecing. The presser foot will also help to reduce how much the top layers of fabric move while sewing. It is a good idea to use a long, 90/14 needle, which are specifically designed for fabric and batting. It is also advised to adjust the presser foot tension to a light setting and decrease the number of stitches per inch.
Thread & Pin the Fabric
Choose a colour thread that suits your project, and one that is made specifically for quilting. Don’t forget to adjust the length of your stitches and the tension of the thread to be slightly looser to allow for the multiple layers of fabric and batting. The stitch width is also important during quilting; a wider stitch may do better for thicker, thicker quilting pieces, like small appliqués. Next, it is time to layer your quilt pieces. Sandwich the top piece, batting and backing piece together, and pin them together. Start at the center of the piece and work your way out, pins should be inserted no more than two inches apart from each other.
Sew the Fabric Together
This is the fun part – start sewing! Start at the center and work your way out, and just like when pinning, sew no more than two inches apart. Many experts also advise when quilting to always stop with the needle in the down position and raise the presser foot to turn your quilt pieces. Always remember to sew slightly larger ¼ inch seams, which allows for accurate piecing, and gives a more comfortable finish at the end.
Seam Allowance
When quilting, having a consistent seam allowance is key. Consistent seam allowances means that when going to press your quilt for binding, the edges will all be uniform, and the quilt will lay flat. Trimming the edges of the quilt will help establish that consistency. However, it is important to not cut too far into the seams; it is better to have a little extra fabric than not enough. If you need to get tighter corners, then using a quilting ruler is best to ensure accuracy.
Quilting a Blanket Borders
Adding a simple border to the quilt can help to frame the piece and display the quilt pattern. Whether you decide to pick a simple or intricate border, the goal is the same – making sure that the top and bottom lengths are equal, and that the sides are equal. Start by measuring the quilt, then add in two inches for the seam allowances. Cut two strips for the top and two for the bottom, and two for the sides which will be pieced together in different sections. Make sure that the grain of each section of the border is going the same direction.
Bind & Finish Quilt
Binding encloses the raw edges of a quilt top, batting and backing fabric. Measure the length of the quilt to determine the length of binding needed. Create the binding with 2 ½ wide strips of fabric and sew them together at a 45 degree angle. You can either make the binding out of the same fabric or use a contrasting fabric. After pressing the seams open, fold the strip in half, wrong sides together, and press. Pin the binding to the right side of the quilt and stitch in place. Many quilters also prefer to hand sew the binding in place.
Quilt Care & Maintenance
Caring for your quilt is an important step to ensure the durability and longevity of your quilt. Once you have finished the quilt, you must thoroughly wash it to remove any excess dye, debris or grime. Make sure to use the recommended quilt care instructions on the fabric. After washing the quilt, you will want to dry it to prevent wrinkling. Drying the quilt on a flat surface is best.
Quilting with a Walking Foot
A walking foot is extremely helpful if you plan to sew multiple layers of fabric together. The walking foot helps maintain a consistent feed in all directions of fabric, eliminating the need to rotate or twist while sewing. It is also a great tool to use when sewing curved or bias-cut pieces, as well as issues with alignments that usually occur. You may need to make a few adjustments to your sewing machine so that you can attach the walking foot.
Various Quilting Patterns
No quilt is complete without a quilting pattern; a well thought out quilt design can take a quilt to a whole new level. As you may know, there are hundreds of quilting patterns to choose from, from simple squares and rectangles to elaborate stitch-in-the-ditch designs. Choose from free-motion quilting patterns or block quilts, the possibilities are endless!
Quilting for Beginners
If you are just starting out with quilting and looking to get familiar with the basics, then piecing and free-motion quilting are great quilting skills for beginners to start with. Investing in a good walking foot, quilting needles and thread are also key components for successful quilting. Patience is also a requirement; having an understanding of the quilting process and moving forward in small, steady steps will help to yield good results and get the most out of your time.
Creating Quilting Templates
When making quilts, it can be time consuming to draw out and cut the quilting pieces to ensure accuracy. To make this process easier, create quilting templates ahead of time with heavy paper, such as poster board or manila folder. Once the quilting template is created, you can use it to draw out the shape that you want on the quilting fabric, and then use it to add the shape to the template. This can save a lot of time and hassle!
Designing a Quilt Top
Creating a quilt top takes time and is an essential part of the quilting process. Deciding on a quilt design and color scheme is a fun part of the creative journey. You may want to use an existing quilting pattern or maybe you want to create something one of a kind – the choice is yours. Many quilters also choose to arrange their pieces in a certain way, such as by color or size, before sewing them together.
Quilt Backing Material
Choosing a backing material for your quilt can be challenging. It is important to pick a material that is durable and can withstand years of wear and tear. Popular choices for quilt backings include flannel, cotton and muslin. There are also specialty quilt backings that can be purchased, such as batting or quilt coating. Whichever backing material you decide to go with, it is important to make sure that it is large enough to cover the entire quilt, and that the finished quilt top and backing is the same size.


