Threading the Bobbin
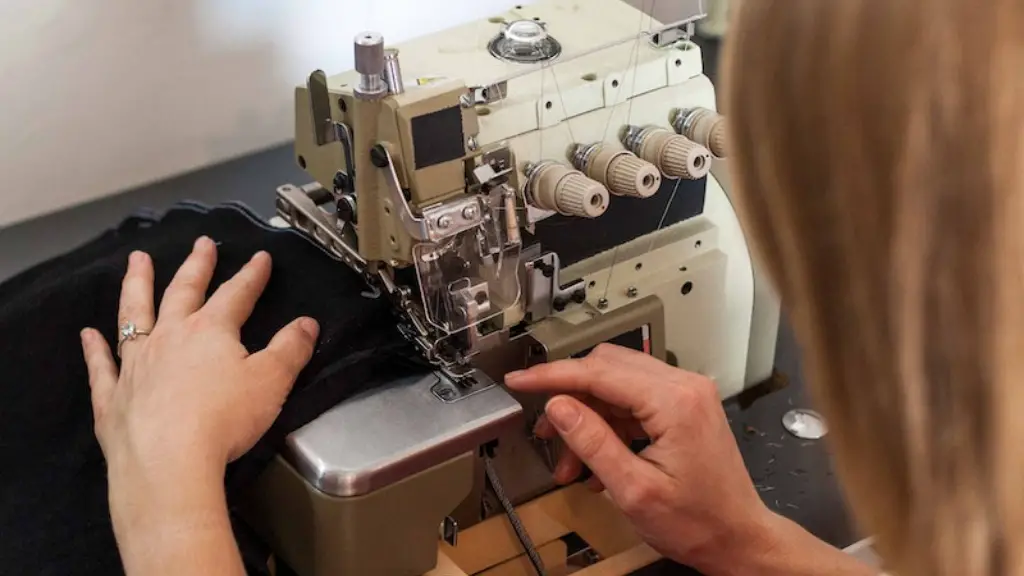
Before you can start sewing with a Singer sewing machine, you must thread the bobbin. Thread the bobbin by inserting it into the bobbin case, running the thread through the guides and thread slot on the bobbin case and winding the thread around the bobbin. Make sure the end of the thread is securely tucked into the bobbin case. Make sure the bobbin is inserted into the bobbin case the correct way; direcions can be found in your Singer sewing machine owner’s manual. Once the bobbin is securely in place, slide the bobbin case into the shuttle race. As a precaution, use your finger to press the bobbin case down firmly and make sure the case is securely in place.
Setting the Tension
Threading the bobbin is just the first step to setting up your Singer Sewing Machine for a successful sew. The most important step is to adjust the tension. The tension of the thread must be balanced for your desired stitch. If the upper thread tension is too tight, it can cause puckering on the fabric and the bobbin thread to loop on the fabric. If the upper thread tension is too loose, the stitches can look sloppy. Knowing how to set the tension on the Singer sewing machine is key. To set the tension, find the tension dial on your machine and adjust according to the threads manufacturer’srecommendation. It is also important to check the thread guides and needles as needed.
Checking the Thread Path
Once the bobbin is threaded into the shuttle and the tension is set, the next step is to check the thread path is clear and free of obstruction. Start at the spool holder, making sure the thread is going through the set of thread guides provided. The thread should then travel to the tension control mechanism and go through the correct eye of the needle and into the needle groove. To ensure proper thread delivery and consistent stitching, it’s important to keep this thread path free of snags or obstructions. If you’re having trouble threading your fabric, consider using a thread path diagram that comes with your machine.
Test Sewing
Now that your machine is threaded and tension is set, you’re ready to test sew. Once you select your stitch, it’s a good idea to test sew on scrap fabric as this will reveal how the machine and fabric will interact. Make sure the needle is properly inserted into the fabric and the stitch size and tension are adjusted as needed. If any of the stitches look incorrect or if the machine is sewing unexpectedly, make sure to check the threading and the tension and adjust accordingly.
Lubrication and Maintenance
The Singer sewing machine requires regular lubrication and maintenance. The process of lubrication should be done at least once a year. You can lubricate the sewing machine with light oil, such as 3-in-1 oil, or a specialized lubricant designed for your machine. Make sure to check all moving parts, such as gears, belts, and needles, and periodically clean your machine and its parts, as this can help maintain optimum performance. Consult the Singer sewing machine owner’s manual for the proper lubrication and maintenance procedures.
Essential Accessories and Presser Feet
The Singer sewing machine comes with a wide range of accessories, such as bobbins, needles, and presser feet. These accessories can help you achieve specific and special types of stitches, as well as faster and easier sewing. It’s also important to know how to select the right presser feet for your sewing projects and how to properly attach them to the sewing machine. The presser feet can be manually attached by using screws or clips, or by using the snap-on feature provided on the machine. Again, read the manual carefully to make sure the presser foot is securely attached and will not come off while sewing.
Troubleshooting Tips
No matter your level of experience, it’s always helpful to review troubleshooting tips. If the thread on your Singer sewing machine is not looping properly, make sure the needle is inserted correctly into the machine and the fabric is inserted properly as well. Also make sure the tension settings are correct, as this is one of the most common issues when it comes to stitching. Additionally, it may help to use the wrong side of the fabric when testing and make sure to use the needle size according to the fabric you’re sewing. Keeping a troubleshooting guide handy can prove especially useful in those moments of frustration.
Managing Thread Tension with Different Fabrics
Your Singer sewing machine should be able to handle a variety of different fabrics, from knits to wools and silks. When sewing with these different fabrics, the thread tension should also be adjusted accordingly to make sure the stitches look uniform and perfect on each fabric. Generally, heavier thread will require a loosened thread tension, while lighter thread will require tighter tension. You may have to experiment with different fabrics and adjust the tension knob each time to get the desired results. The owner’s manual should also provide information on different thread tension settings for specific fabrics.
Fault Finding & Diagnostics
If you are running into problems with your Singer sewing machine, there are a number of different fault-finding and diagnostics you can use. Running a troubleshooting guide will be especially helpful if you come across unexpected results. Make sure the needle is intact and properly inserted into the fabric, and check the thread guides to make sure the thread is travelling freely through them. It is also important to make sure the presser feet are securely attached and the tension settings are correct. If the thread is not looping properly, you can try recheck the thread path, rethread the machine and make sure the bobbin is securely inserted into the shuttle.
Polishing and Cleaning For Maintenance
One of the best ways to maintain your Singer sewing machine is to clean it thoroughly and regularly. A good cleaning with a damp rag should do the trick. Make sure to remove any loose lint and threads with a brush and vacuum the machine to remove any dust that may have collected. Once the machine is clean, you can use a specialized polish to help protect the surface from rust and oxidation. When using a polishing cloth, make sure to move the cloth along the grain of the metal, rather than scrubbing back and forth. After polishing, use a clean dry cloth to buff out any excess polish.
Replacing & Adjusting Needles & Presser Feet
It is important to periodically check and change the needles on your Singer sewing machine. Inspect the needles every few weeks and change them regularly to ensure they don’t become blunt or damaged. Presser feet should also be regularly checked and adjusted or changed as needed. If you run into problems with skipped or uneven stitches, make sure to check the presser feet, as they may need to be recalibrated or replaced. The owner’s manual should have instructions on how to change, recalibrate and adjust the needles and presser feet.
Understanding & Controlling Stitch Length & Width Settings
The stitch length and width should be adjusted according to the type of fabric you are using, as well as the size of the project and the type of stitching you are doing. The stitch length will determine the distance between the stitches, and the stitch width will determine the width of the stitches. To control these settings, consult the user manual, as different machines may have different controls and settings. Generally, it is best to set the stitch length to a medium setting, as too long of a stitch can cause the fabric to pucker, and too short of a stitch can be too tight and not secure the fabric correctly.


