How do I Thread A Janome Sewing Machine
Although modern sewing machines are made with the intention to reduce the workload of the sewers, they are still complex pieces of machines that require instructions to use properly. Janome is the world’s leading producer of sewing machines and its products are very popular among amateurs and professionals alike. Hence, properly threading a Janome sewing machine is an essential skill for all sewers. A step-by-step guide will help you understand the process of threading a Janome sewing machine quickly and easily.
To begin with, it is important to choose a suitable thread for the project. The wrong thread choice can lead to untidy results and unexpected damage to the machine. Different Janome models accept thread of different lengths and thickness, so it is important to check the thread specification for the particular Janome model. The thread composition also affects the result and appearance, so the user must choose carefully so as to produce the desired results.
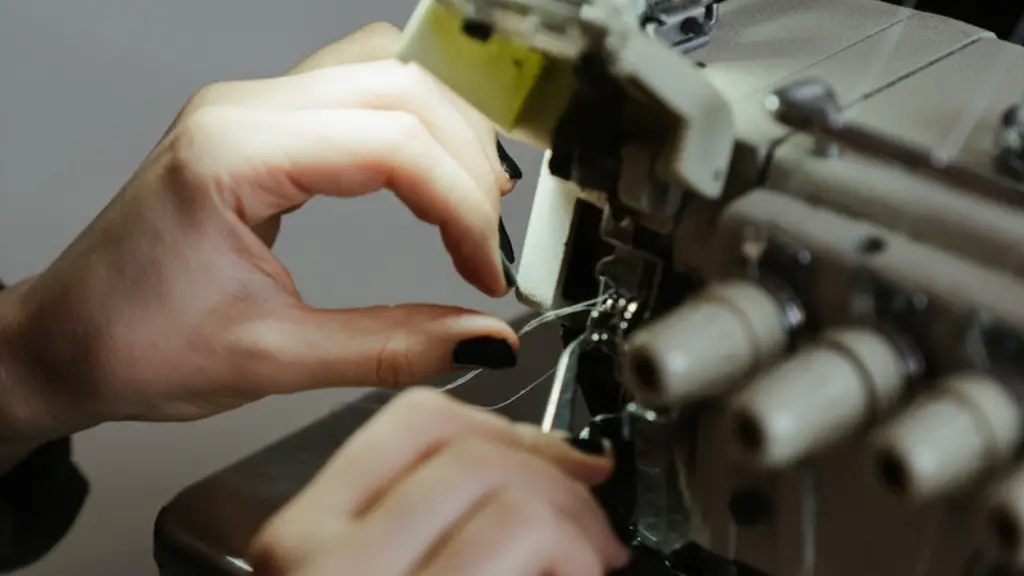
In order to thread the machine, the user should start with attaching the spool of thread on the designated spool pin at the top of the machine. Do not forget to place the spool cap over the top. After that, pull the thread taut and lead it down the left side of the machine and place it around the take-up lever, which is usually directly across the thread spool. This creates an up and down motion that is the foundation of how the machine sews.
The thread then needs to be guided around the tension discs. The thread should pass under the discs, but over the release lever. Pull the thread towards the back of the machine and lead it around the bobbin winder thread guide. Once the guide is determined, the thread should be passed in the slit from the back to the front. The thread should be hooked on the small tension seizes and the end of the thread pulled across to the left side.
Through this stage, the user needs to find the threading path for the bobbin, which is located to the right. Again, it is best to check the manual for the specific threading path. In most cases, the thread passes first under the slit and then around the bobbin’s middle onto the post on the right side, with thread going left to right.
Once the bobbin is full, it can be inserted into the case. While holding the end of the thread, push it all the way down. Stick the thread into the bobbin and pull it up the other side and lead it across the front of the machine. While the bobbin is in the case, give it a few small turns to make sure the thread is properly engaged. With that, the machine is threaded.
Now, it is time to connect the upper thread and the bobbin thread. Slide the thread ball holder to the right and lower the presser foot. Give the upper thread a pull and the machine should start to do its job, pulling up the looper thread from the bobbin. Pull the upper thread and the looper threads around the needle plate for the best result.
Although threading a Janome sewing machine may seem complicated, it is actually a simple process and with a bit of practice, it can even become effortless over time. This process is the same for all the Janome models, so it is good to know one and carry it with you through your sewing journey.
What Can Impact On Threading A Janome Sewing Machine
Before threading a Janome sewing machine, it is important to understand the significance of the components for successful threading. Incorrect threading brings about undesired results, breakage or malfunction that disrupt the process, so a comprehensive knowledge is essential. Different factors can influence the threading.
First and foremost, the thread quality. Different Janome models accept thread of different lengths and thickness, hence it is important to check the thread specification for the particular Janome model. There are various materials of thread compositions, including cotton and polyester, and it is important to choose the right one for the desired results. The wrong thread choice can lead to untidy results and even damage the machine.
In addition, the tension also plays an important role in the threading. The tension of the thread should be adjusted so that it passes through the machine easily, making the process efficient and ensuring the best results. The tension must not be too loose, as it will lead to skipped stitches and puckering of the fabric. On the other hand, too tight tension tends to shred the thread and makes it difficult for it to pass through the eye of the needle.
In some cases, the tension can be too sensitive, either not holding or being too tight to pass through the needle. This is a mechanical issue, which can influence the threading process. If the problem persists, it is wise to seek professional help, in order to avoid any wrong setup or mechanical damage.
In muls, the user must understand how to set the bobbin so that it interacts with the thread in the correct way. If the bobbin is set in the wrong way, the stitch will be confused and ends up being a tangled mess. It is important to thread it correctly and make sure the thread is running in the same direction in order to produce the desired results.
Tips For Threading A Janome Sewing Machine
Threading a Janome sewing machine can be a tricky but rewarding process, it is important to follow the instructions carefully to make sure the machine is threaded correctly. Here are a few tips for threading a Janome sewing machine for better results.
Firstly, be sure to tidy the machine. To make sure the thread passes through the guide plates in one fluid motion, it is important to check that the bobbin holder, needle plate and tension discs are clear of lint and dust. This also stops any possible snagging of thread.
Next, use the thread cutter functionality, which is available in certain Janome models. This can save a great amount of time and effort if used properly; it serrates the old thread automatically. It is recommended to use this function often to ensure there is no build-up of thread in the stitching path.
In addition, it is necessary to know how to stop and start the machine. This is key to good machine handling and should be put into practice when threading. As the machine is threading, press the reverse stitch button. This will ensure that the thread forms a helix pattern and will be kept away from various components.
Finally, always aim to be neat while threading. Threading is a part of many run tasks when sewing and leaving the threading process incomplete or untidy will reflect in the end results. Manage the thread and guide it in an orderly fashion.
Why Threading Is So Important For Janome Sewing Machines
Threading is the foundation of a Janome sewing machine. The machine will not be able to function without the thread – it is a fundamental step that cannot be avoided. Without threading, the sewing machine won’t even produce a single stitch and will become rendered useless. Following is why threading is so important.
Threading a Janome sewing machine creates an up and down motion that allows the machine work its magic on the fabric. Placing thread around the take-up lever results in an automated system that controls the large loops of thread. Hence, the thread takes its shape in the available space and controls the tension and stitch formation.
Threading a Janome sewing machine is also important while threading the needle. If the thread is not properly placed around the needle, it won’t be able to direct the stitching. Also, by threading wrong, the needle will be unable to draw the thread fibre through the fabric, resulting in skipped stitches.
Finally, successful threading gives the machine the power to move from one stitch to the next and produce a neat finish. It is important to thread the machine properly because it ensures that the stitch quality is superior; an improper threading can lead to a thread jam, broken needles, and even stitches that unravel. Therefore, to ensure the best performance and results, proper threading of the Janome sewing machine is necessary.
What Happens When Threading Is Misused On A Janome Sewing Machine
Threading is a basic step for a Janome sewing machine and must be done properly in order to get the desired outcome. Improper threading brings about undesired results, breakage or malfunction that can disrupt the process. Following are the possible consequences of wrong threading.
Firstly, skipped or broken stitches. If the thread is not correctly held by the tension discs, the machine will be unable to pull the thread properly. This results in wrong stitch formation and skips or broken stitches. Additionally, the tension should not be too tight, as the thread will be shredding.
In addition, it is possible to damage the needle due to improper threading. If the needle is not correctly placed in the needle plate, a lot of tension builds up and the pressure causes the needle to break. This is a common occurrence if the user is struggling to thread the needle.
Threads can also get tangled in the machine if the threading is done wrong. This usually happens when the threading is improperly done, forcing the thread to be tugged tightly while the machine is stitching. This can cause knots and tangles which slow down the process, leading to an unsatisfactory or unclean finish.
Finally, incorrect threading can cause a lot of noise. A high-pitched squeaking sound is often heard when the thread is not in the correct path, indicating that the thread is not threaded properly. As the thread is being tugged through the machine, this noise goes on and can become annoying.
How To Maintain Your Janome Sewing Machine After Threading
A Janome sewing machine is an investment and it is essential to keep it clean and well-maintained. The threading might be the most important step, but there are a few rules to follow in order to preserve the machine properly. Here are a few tips that will help you maintain the machine.
Firstly, always store the machine in a dust-free area. A good option is a sealed plastic bag, as it will form a barrier between the machine and the dust. This helps to maintain a good working condition and all components remain free of lint and dust.
In addition, an oil maintenance is must-do. Regular oiling of the machine will help to make sure that the components move freely with no friction or resistance. Of course, refer to the machine’s manual for the recommended dosage, as this will vary with different models.
It is also important to clean the machine after each use. All the components should be carefully inspected for dust and dirt. Clean it up with a cloth and perform a thorough check. Do not forget to check the needle, as dirt and dust can accumulate in its small crevices.
<
