Introduction
Changing a sewing machine foot is an important part of maintaining a sewing machine. This is because there are many times when a particular foot attachment is more suitable for a particular type of fabric, or when a certain stitch pattern requires a special foot. For beginners, it can be a bit intimidating to change a foot attachment, as it requires some practice to get the right angles and tension right. This article will discuss the steps on how to change a foot attachment on a sewing machine, and provide tips on how to get the best results.
Understand the Different Types of Foot Attachments
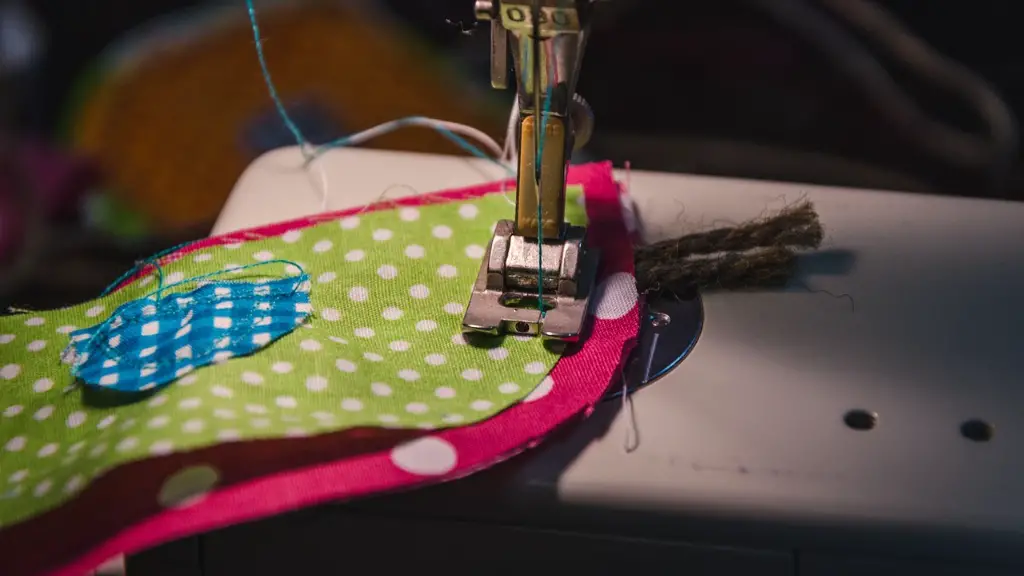
Many sewing machines come with a variety of foot attachments including zigzag, straight-stitch, quarter-inch, edge-stitching, and buttonhole feet. Knowing the purpose of each type of foot attachment can help you decide which one to use for a particular sewing project. In addition to the traditional foot attachments, some sewing machines also have special feet such as a gathering foot, bias tape foot, or zipper foot. In order to change the foot attachment, you need to understand how it attaches to the presser foot.
Prepare the Machine
Before changing the foot attachment, make sure the needle is in the up position and the fabric is pulled out of the way. Unplug the machine and make sure there is no tension on the presser foot by removing the bobbin case and disengaging the pressure foot lever. This makes it easier to remove and attach the foot attachments.
Remove the Foot Attachment
Once the machine is ready, you can start removing the foot attachment. To do this, press down the lever on the side of the machine and then unscrew the knob at the back of the foot. This will loosen the foot and allow you to pull it off.
Attach the New Foot Attachment
To attach the new foot attachment, begin by threading it onto the presser foot. Then press down the lever on the side of the machine and tighten the knob at the back of the foot. This will secure the foot and help keep it in place.
Adjust the Pressure Foot Lever
Once the foot is attached, adjust the pressure foot lever so that the foot is properly mounted. To do this, insert the lever into the slot on the sewing machine and rotate it until it is tight. This will help ensure that the foot is correctly secured with the right amount of pressure.
Test and Adjust
Once the foot attachment is properly mounted and the pressure foot lever is engaged, it is time to test the machine. Start by sewing a small test seam and pay close attention to the stitch length and tension. If the stitch is uneven or too tight, the foot attachment may need to be adjusted.
Maintenance
It is important to regularly check the foot attachments for signs of wear and tear, such as bent metal or cracked plastic. If any of these issues are found, it is best to replace the attachment. Additionally, try to clean the foot attachments after every stitch job to keep them in top condition.
Tips for Changing a Foot Attachment
When changing a sewing machine foot attachment it is important to remember to be patient and take your time. Sewing machines, like all machines, require proper maintenance and care in order to get the best results. Additionally, it is important to always keep in mind the purpose of the foot attachment and how it will affect the fabric, stitching, and stitch length.
Professional Assistance
If you are still having difficulty changing the foot attachment, try consulting with a professional for assistance. Professional seamstresses, or those who work in fabric shops, can be a valuable source of information about how to properly change a foot attachment. They can provide advice and troubleshooting tips that can make the process simpler.
Extra Foot Attachments
In addition to purchasing a variety of foot attachments, it is also a good idea to buy spare ones. This way, if a particular attachment becomes worn or damaged, you can replace it quickly and easily. Many sewing machine stores and online retailers sell a wide selection of spare parts, including foot attachments.
Storage
Once all of the foot attachments have been purchased and installed, it is important to properly store them. Make sure they are kept in a cool, dry place and protected from dust and dirt. Additionally, it is best to keep the foot attachments organized by type and size. This will help ensure that you can quickly and easily find the right foot for the job.
Conclusion
When it comes to sewing, having the correct foot attachment is essential for quality stitching. Taking the time to properly change a foot attachment on a sewing machine will help to ensure that you get the best results. From understanding the different types of foot attachments, to understanding how to attach and adjust them, these steps will help you achieve success. With a bit of practice and patience, you can master the technique and achieve professional results.


