Basics of Sewing Machine Tension
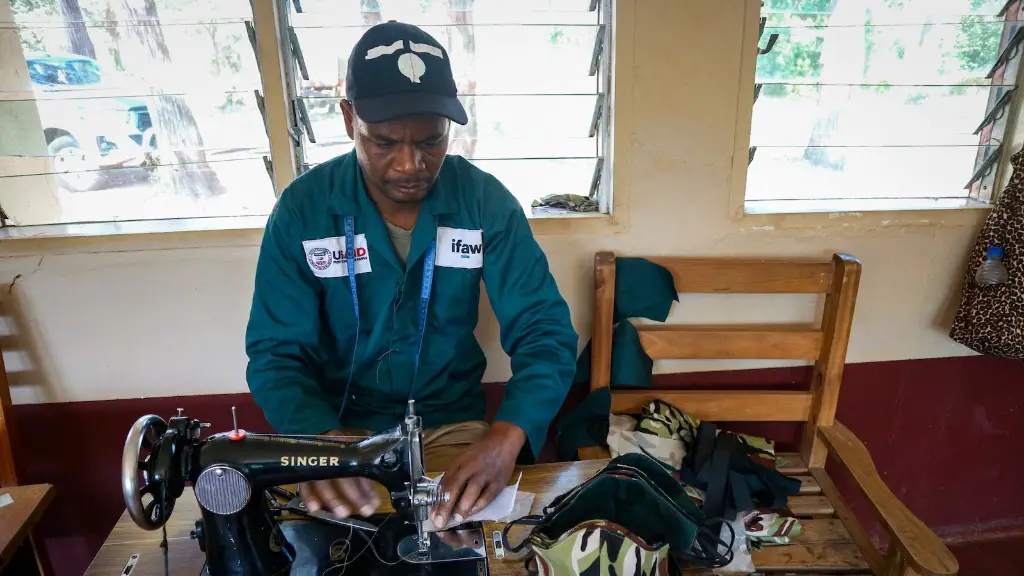
Most beginners who are getting into sewing on a Singer sewing machine are confused by the idea of setting the tension on the machine. If they read this article, they’ll get a better understanding of what tension means and when it is necessary to adjust the tension. Setting tension can be tricky, so the first step is to read the instruction manual that came with your machine. Ensure that all the components and accessories assembled on the machine are in the correct place and located properly.
Next, start the machine up at a slow and steady pace. This will help to ensure even stitches when sewing and will also be easier to adjust compared with running the machine at top speed. When sewing, watch the fabric closely as it passes through the machine, as any changes in stitch length and size may indicate incorrect tension. If this occurs, adjust the tension control, which is usually located just above the needle bar area.
The correct tension will make the thread on both the top and bottom looks almost the same. If the tension is too tight, puckers may develop in the material and the thread will become stretched too tautly on one side. If the tension is too loose, loops may form on the underside of the fabric.
To gauge tension, use a scrap of the fabric you’ll be working with and practice adjusting the tension until it is optimal for each type of fabric. Some fabrics like cotton require a different tension then knits and silks. Take notes of how you’ve set the tension and save them – this will save you time from not having to readjust the tension each time you want to use the machine.
When changing the type of fabric being sewn, it is important to check the tensions setting and make adjustment accordingly. Before any adjustment is made, however, it is important to properly test out the new tension settings on scraps of the new fabric. Doing so can help save time, money, and prevent the need to remove any stitches.
To test the tension further, use the seam ripper to open the sample thread seam in order to check the tension accurately on both sides. The tension should appear balanced and even on both sides of the seam, with no signs of looping on the underside or puckering on the top side.
There may be some slight differences when it comes to the finer details or specifics of tension settings for some Singer sewing machines so it is important to read the user guide that came with the machine for model specific information. Secondly, experiment with the tension settings when using external features such as zippers, buttons, and other accessories.
Fabric Matters in Setting Tension
The type of fabric being used is an important factor when it comes to setting the tension on a Singer sewing machine. For example, when one is using thicker fabrics, tighter tension will be needed to pass the fabric correctly. Stretch fabrics will require lower tension while using heavier items such as zippers and buttons will need more tension.
It is important to experiment to find the right tension for the fabric that is being used. Sewing a test seam is the best way to determine the proper tension for the fabric being used. Lay the seam flat and check for evenness in the stitch length, regularity in the tension and that there are no puckers or loose ends.
When sewing any type of fabric, it is important to use the correct needle size for that particular project. For example, when sewing denim fabric and heavy material, a thick needle with a bigger eye and sharper point will be needed compared to when sewing light fabrics.
Having the wrong type of needle, or the wrong tension, can result in damage to the fabric being sewn, skipped stitches, and even ugly-looking seams. The standard needle size to use is an 80/12 but it is important to check the material type to ensure the right size is being used.
Each Singer sewing machine comes with a comprehensive explanation of its features. The instruction manual will provide all the necessary details of proper tensioning, as well as all the possible stitches that the machine is capable of, and the fabrics and needles that should be used with each stitch.
Stitch Length and Tension
When it comes to setting the tension on a Singer sewing machine, the stitch length is an important factor. This determines the length of each stitch as the fabric is being sewn. Stitch length can be adjusted manually by turning the zero balance, or it can be done by the presser foot.
A rule of thumb is the tighter the fabric is stretched, the smaller the stitch length should be. By pressing the presser foot, the fabric will pull tight and tighten the stitching, which will reduce the chance of the fabric loosening beneath the stitches.
Setting the stitch length correctly and adjusting it when using different types of fabric is important in order to achieve the desired results. Different materials will require different stitch lengths and some fabrics such as knits and delicate fabrics may require a shorter stitch length.
It is important to test the tension and stitch length settings on a scrap of the material that is going to be sewn. Sew a seam and then hold the seam open, check to make sure the fabric is not pulling in any direction, and that the stitch is sewn nice and evenly all the way across.
Using the wrong stitch length can cause the fabric to draw up or can cause puckering. If the stitch length is too short, it may be causing the sewing machine to skip stitches or jam. Adjusting the stitch length too much can cause an uneven seam or a seam that does not hold up.
Incorrect Tension
Incorrect tension can cause serious problems when sewing and it is important to check the tension settings often. If the tension is too tight, puckers may form in the fabric and the thread may become too tautly stretched on one side. If the tension is too loose, loops may form on the underside of the fabric and the fabric may bunch up on one side.
Incorrect tension can also cause the thread to break while sewing, uneven stitches, and a loss of control of the fabric being sewn. To reduce any chances of these issues occurring, check the tension settings while using a scrap of the same fabric that is being sewn and test it carefully.
If the tension is too tight, the thread may be slowed down or prevented from flowing through the machine. If this occurs, the machine may skip some stitches or jams may occur. If the tension is too loose, then the bobbin thread may show on the surface or loops may appear on the underside.
If unsure of the tension or any other settings on the machine, reach out to a qualified technician who will be able to inspect and make any necessary adjustments. Additionally, they will be able to provide advice on certain fabrics and when certain stitches are needed. In summary, correct tension is an important part of sewing on a Singer sewing machine, but can be easily corrected by following the instructions above.
Advanced Tension Settings
Once the basics of setting the tension on a Singer sewing machine have been mastered, one can move on to more advanced settings. For example, one can make changes to the loopers and tension discs in order to tighten or loosen the tension on the thread. It is also possible to adjust the positions of the presser feet to ensure the fabric is pulled evenly through the machine as it is being sewn.
Additionally, for advanced sewing projects such as creating tailor-made garments, the feet on the machine can be raised higher to pull more fabric through the machine and to increase stitch length. It is important to note that the stitch size, type, and thread tension of a project should all be taken into consideration before increasing the stitch length.
Advanced adjustments can also be made to the presser foot pressure, allowing more control over the fabric, and allowing more delicate fabrics to be sewn without the risk of any puckering. It is possible to adjust the presser foot pressure to a lower setting, especially when sewing on very delicate fabrics.
Adjustments to the machine can also be made to allow for specialised stitches such as gathering and tucking. To create these stitches, the thread tension needs to be lowered slightly, and the feed dogs need to be aligned differently. Additionally, an extra plate will likely be needed for the fabric to pass through easily and for the stitches to appear properly.
Threads and Bobbins
A plain thread can often be used for simpler projects. However, heavier threads or specialised threads may be required for certain sewing projects. Using the heavy thread may mean making adjustments such as increasing the tension or decreasing the stitch size in order to allow the thread to flow properly through the machine.
Bobbins are also an important component of setting the tension. The bobbin case needs to be inserted correctly to ensure the settings are correct and the machine is running smoothly. For the tension to be correct, the bobbin thread needs to loosen as the fabric moves through the machine as it sews.
It is important to make sure the bobbin is inserted correctly, as a thread jam may occur if it is inserted the wrong way. Additionally, it is possible to insert the bobbin incorrectly, which can prevent the thread from winding correctly, which can cause looping on the bobbin thread.
In summary, setting the tension on a Singer sewing machine is an important step to ensure even stitching and the desired results. The basics of tension setting should be understood before attempting any type of advanced sewing projects and adjustments. In addition, the correct thread and bobbin should also be used to ensure the best results when sewing.
