Lubrication is Key to Proper Maintenance
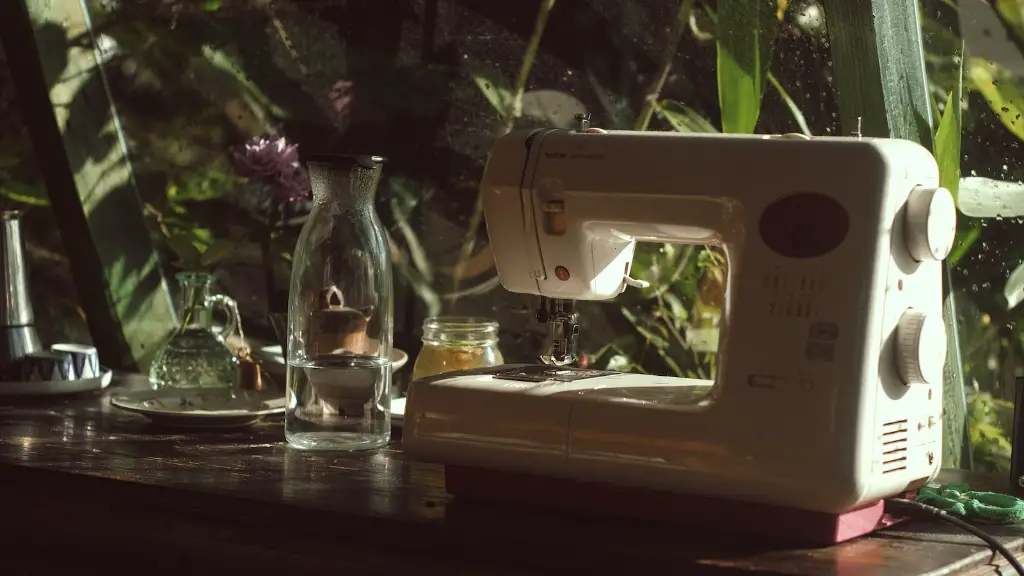
Brother sewing machines are among the most durable and reliable machines available and are favored by crafters and garment makers alike. But in order to keep your machine running and operating in top condition, it is essential to clean and oil it regularly. This article will discuss the reasons behind cleaning and oiling your sewing machine, and provide instructions on how to do so.
The most important reason for regular maintenance is to keep your machine running optimally. Like any complicated machinery, your sewing machine can suffer from general wear and tear over time. This is especially true if dirt and dust residue accumulate within the various parts. If left unchecked, these unwanted contaminants can jam the parts and create numerous problems. To prevent this, and to ensure a long lifetime of use, it is best to clean and oil your machine every few months.
The first step to cleaning your machine is to give it a good visual inspection. Look for excessive dirt and grime build up, as well as any other signs of wear and tear. If your machine is relatively clean, you can simply use a lint-free cloth and some warm soapy water to wipe it down. However, if there is a large amount of dirt or residue, it is best to use compressed air to blow it off. This will help to dislodge any grime that is stuck in inaccessible areas.
Once you have finished cleaning the exterior, it is time to move onto the more delicate internal components. Begin by taking a look at the bobbin case, which is the cylindrical-shaped housing for the spool of thread. This should be opened and cleaned with a lint-free cloth and some isopropyl alcohol. The presser foot should also be wiped down, as this part can become clogged with dust and thread particles. Finally, check the feed dog, the part that grabs and holds the fabric, and remove any accumulation of dirt, dust, thread and lint.
When it comes to oiling your machine, it is important to use the proper type of oil that is safe for your machine. Sewing machine oil is specifically formulated in order to keep moving parts running smoothly. Avoid using any type of generic lubricant, as this can damage delicate materials. Once you have acquired the correct type of oil, use a small dropper to place several drops on the machine’s moving parts. This can include the bobbin case, presser foot, and the feed dog. Additionally, you may also want to oil the points where the thread is routed, as this can help to reduce friction.
Check for Any Mechanical Issues
Once you have finished cleaning and oiling your machine, it is important to check for any mechanical issues. Start by giving the machine a few test stitches. If the stitch appears tight and even, then the machine is likely working properly. However, if it looks uneven or the fabric is puckering, then you may need to adjust the tension. Thankfully, this is a relatively simple process and can be done by simply turning a knob or lever on the needle plate.
You should also check for any parts that may be loose or damaged. Focus on the bobbin case and the needle, as these are the two components that are most likely to be affected by general wear and tear. Of course, if any of these parts appear damaged, it is best to have them replaced by a professional or take your machine to a repair shop for servicing.
Finally, it is always a good idea to refer to your machine’s manual when cleaning and oiling your machine. This will provide you with additional instructions on how to care for and maintain your machine, as well as any additional information you may need to know.
Preserve Your Machine for Years to Come
Cleaning and oiling your Brother sewing machine is a relatively simple process and can be done in as little as 30 minutes. By following these steps, you can help to ensure that your machine runs optimally and preserve it for years to come.
Tips for Avoiding Problems
Caring for your machine is essential to avoiding problems down the line. There are a few simple tips that you can follow to ensure your machine runs properly.
One easy tip is to always wind the bobbin thread in the same direction as the end of the thread spool. This simplifies the feeding of thread into the machine, as the bobbin thread winds correctly onto the spool. Doing this is also important to reduce the risk of knots and tangling.
Additionally, it is a good idea to change your needle after each sewing project. The less expensive universal needles are the best option for the vast majority of fabrics, as the point is slightly rounded, rather than sharp, which helps to reduce damage to fabrics.
You should also always make sure that your machine is fully threaded and that the correct size and type of thread is used for the project. This is especially important for finer fabrics, such as silk or chiffon, which require loosely-wound spools of thread.
Finally, be sure to replace any broken or worn parts immediately. This includes oil connection lines, thread tension discs, feed dog height adjusters, and needle plates.
Check and Replace Parts
Replacing broken or worn parts is essential to keeping your machine running in top condition. Start by inspecting all moving parts and make note of any that appear worn or have become loose. This can include any oil connection lines, thread tension discs, feed dog height adjusters, needle plates, and more.
Once you have identified which parts need to be replaced, you should refer to your machine’s manual and purchase the correct replacements. Once the new parts have arrived, follow any instructions provided on how to install them and be sure to double check that they are securely fastened before attempting to sew.
Finally, once the new parts have been installed, it is important to test that they are working properly before moving onto the next step. This is especially important for safety reasons, as any malfunction could lead to problems during the sewing process.
Storing Your Machine Properly
Once you have finished your sewing project, it is essential that you store your machine in a clean and dry place. If possible, try to keep your machine in its own carrying case so that dirt and dust are kept out. Additionally, it is important to remember to unplug your machine from any outlets before storing it, as this will help reduce the risk of electric shock or fire.
Finally, it is a good idea to use a cover over your machine before storing it away. This will help to protect the delicate internal components from dust, dirt, and other contaminants.
Stay on Top of Maintenance
Once you have finished cleaning and oiling your machine, it is important that you stay on top of regular maintenance. This means regularly wiping it down with a lint-free cloth and checking for any buildup of dirt or dust. Additionally, it is essential to inspect the presser foot, the needle, and other delicate parts for any signs of wear and tear. If you notice any, promptly replace them in order to ensure that your machine continues to run optimally.
Finally, sewer should also make it a point to refer to their machine’s manual before attempting any major repairs or maintenance. This will provide helpful instructions on how to troubleshoot common issues and ensure that the job is done correctly.
Test the Machine Before and After Repairs
Before and after any repair, it is important to run a few sewing tests. This allows you to identify any problems that still exist, as well as testing how the changes have affected the machine’s overall performance.
During the test phase, it is important to pay special attention to the fabric feed and tension settings. If these are off, you may notice uneven stitches or puckering of the fabric. Make sure to adjust these accordingly in order to achieve the desired results.
Additionally, you should also check for any signs of jamming in the needle plate or bobbin case. This can include noise and vibrations during stitching, as well as fabric not feeding correctly. If you do encounter any of these issues, it is best to refer back to the machine manual or take it to a professional service technician.
Finally, after making a few tests stitches, it is a good idea to check the results. Be sure to look for any gaps or loops in the fabric, as these can indicate that the tension needs to be adjusted. Additionally, you should check the overall appearance of the stitches and ensure that they are smooth and even.
Conclusion
Cleaning and oiling your Brother sewing machine is essential to ensuring it runs properly and remains in top condition for years to come. By following these instructions and regularly checking for signs of wear and tear, you can help to minimize the risk of any major issues arising—saving you money and time in the long run. Additionally, it is always important to test your machine before and after repairs, as this will allow you to identify any issues and make necessary adjustments. With the correct knowledge, cleaning and oiling your machine does not have to be a daunting task and can keep your machine running optimally.


