Basics of Quilting on a Sewing Machine
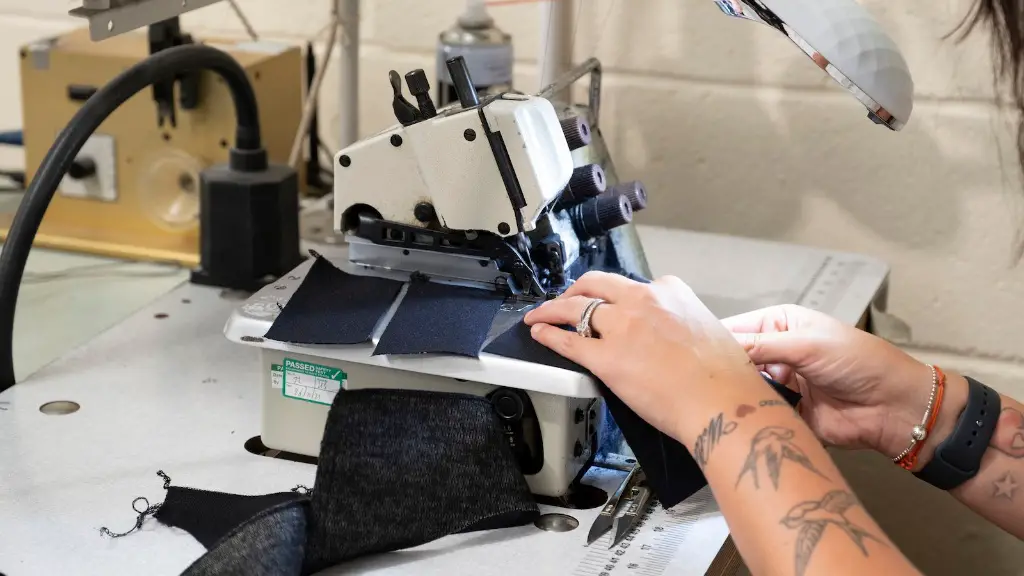
Quilting on a sewing machine is an achievable task that can be enjoyed by beginner and experienced sewers alike. It is a great way to add texture and dimension to both garments and home decor projects. While there are many sophisticated methods of quilting with a sewing machine, it is not necessary to use advanced techniques or combinations of feet or settings to create beautiful quilted fabrics.
The two main components of quilting are the patchwork top and the quilt batting. Patchwork involves taking multiple pieces of fabric of varying sizes and joining them together. Quilt batting is the middle layer between the patchwork top and the backing fabric. This batting provides insulation and is made from many different fibers such as cotton, polyester, or wool.
In order to quilt on a sewing machine, you must first understand the basics. Start by gathering the necessary supplies – fabric, batting, sewing machine and the correct thread. Use quilting needles to prevent skipped stitches and make sure the machine is cleaned and oiled before starting. Also, choose the right stitch length and presser foot before begin quilting. Some great beginner stitches to use include the zig zag stitch, whip stitch and straight stitch.
For quilting with a sewing machine, use a foot with a deep grove which helps to provide more space for the multiple layers of fabric and batting. The general rule is to set the foot length setting to “4”, but it could vary depending on the type of stitch being used. Check the fabric settings of your machine and make sure you are using the correct settings when quilting on thicker fabrics.
It is important to use the correct type and weight of thread when quilting on a sewing machine. Heavier threads can be used for thick fabrics or when quilting on multiple layers. A strong thread should also be used for decorative quilting and bobbin thread should be matched to the top thread for best results.
When it comes to patchwork, it is important to pay attention to the seam allowances. Cut the fabric strips and pieces 1/4 inch wider than the seam line and then press each seam open before quilting. This will help create a flat quilt top and make quilting much easier.
Finally, use basting spray or pins to attach the quilt top, batting and backing together before quilting. Spray basting involves spraying a light mist of adhesive on one side of the quilt sandwich and then pressing the components together. Pinning is also an option, but make sure to use pins that can withstand high temperatures such as glass headed pins.
Pre-Quilting Preparation and Tips
Before starting a quilting project, it is important to complete some pre-quilting preparation and planning. This includes choosing the fabric, layout, quilting design and stitching pattern. Select fabrics in coordinating or contrasting colors and patterns for the quilt top and backing. Quilting designs can include straight lines, curved lines or an allover pattern. Additionally, quilting stitches can be stitched in either the ditch or alternating between rows and columns of patchwork.
To achieve the best quilting results with a sewing machine, use a walking foot. A walking foot helps to evenly feed multiple layers of fabric through the machine. This foot is great for stitching straight quilting lines and curves and can also be used to make quilting templates. To achieve an even stitch, make sure to space the stitching lines evenly, match the tension settings on the thread, use pins instead of basting spray and use the correct stitch length.
Another helpful tip is to press the layers often. This will help create a smooth and even quilt top. It is also important to clip threads frequently to avoid tangles and remove bulk from the layers. If quilting fabric is pulled too high, the layers will be distorted and uneven.
Terms such as “quilting in the ditch” and “stippling” are popularly used to describe quilt designs. Quilting in the ditch means stitching close to the seams of the patchwork top. Stippling is a free motion quilting pattern that uses a stippling stitch in a circular or random pattern. This technique can take practice and it is important to keep the stitch even and the fabric flat.
Fixing Common Quilting Problems
As with any type of sewing, there may be mistakes or problems that occur when quilting. Typical quilting issues include puckers, skipped stitches, and skipped stitches. Puckered fabric occurs when the seams are not pressed flat and can be fixed by pressing the seams in the proper direction and stretching the fabric as needed.
Skipped stitches occur when the machine needle passes through some of the threads but not all, creating a broken stitch. This is typically due to improper machine tension or a worn needle. To fix this issue, make sure to use the correct needle size and check the tension settings.
Thread breaks can occur due to improper threading or too much tension on the threads. If the thread keeps breaking, it could be due to a needle that is too small or a lint build-up in the bobbin case. Changing the needle or cleaning the bobbin case will usually solve the problem. It is also important to use the correct types of thread for the machine.
Quilting Design Ideas
Quilting designs can range from simple to complex. Some popular quilting designs include traditional blocks, curved lines, diagonal lines, hearts, diamonds and swirls. For those who are new to quilting, it is best to choose a simple design that can easily be incorporated into the quilt top. For those who are more experienced, it is possible to combine different designs to create a unique quilted fabric such as a sampler quilt.
Boarders are also commonly used in quilting and can be constructed around the entire quilt or just around a single block. Pinwheel, sunburst and X’s and O’s are some popular boarder designs that can be used to finish a quilt. Other quilting ideas include creating grid patterns, using multiple layers and creating quilt piecing using pre-cut fabric.
Using applique, applique blocks and motifs are a great way to add design elements to the quilt top. Applique can be used to create quilt blocks in the shape of animals, flowers, stars or other images. For those who think outside the box, fabric washers are a unique quilting technique that resembles lace. This method can also be used to add texture to a quilt.
Quilting Techniques and Advanced Tips
When quilting on a sewing machine, it is important to layer the pieces of the quilt in the correct order. Start with the backing fabric, followed by the batting and then the quilt top. Secure the layers together with basting or pins and if using basting spray, let it fully dry before starting.
When quilting with a walking foot, move the fabric in a constant motion and press the start/stop button with your foot. If using a stitch regulator, use it to keep the stitches more even. This will help keep the stitching lines the same size even if the pressure on the foot changes. Another helpful tip is to use a low number on the stitch length setting if using a stitch regulator.
For decorative quilting, some popular techniques include feathering, echo quilting and edge-to-edge quilting. Feathers add texture and dimension to a quilt and can be embellished with other quilting stitches. Echo quilting involves stitching around a motif or image multiple times. Edge-to-edge quilting involves stitching one continuous quilting design across the quilt.
Finally, free motion quilting is one of the most popular techniques for quilting with a sewing machine. Free motion quilting involves stitching without the walking foot and allows for flexibility to create unique quilting designs such as swirls, loops, sashing and stitches with curves.
Finishing the Quilt
Once the quilting is completed, bind the edges of the quilt using a bias quilt binding. This can be done by sewing fabric strips together on the bias and then attaching them to the quilt top using basting spray or pins. Sew around the edge of the binding and secure with a few stitches in the back of the quilt.
Lastly, layer the quilt sandwich with a layer of batting and backing fabric and quilt as desired. Use a quilting hoop to hold the quilt in place and ensure even stitches and consistent pressure on the fabric. After the quilt is finished, you can add a label or mark the quilt as a finished piece.
Quilting Aftercare and Maintenance
Caring for quilts can help them last longer and maintain their beauty. After the quilt is finished, it should be washed in cold water and air-dried or put in a dryer on the lowest setting. For ongoing aftercare, use a no-rinse quilt cleaner when necessary and store quilts in an airtight container or flat surface to keep them dry and clean.
Additionally, make sure to inspect quilts regularly for any signs of damage. Look for loose threads or dark spots and repair them immediately to prevent further damage. Quilts should also be vacuumed lightly to remove dust and dirt, and if necessary, spot clean with a microfiber cloth and a mild detergent.
Finally, press quilts lightly with a low-heat iron before storing them. This will help keep them looking fresh and will help prevent any creases or wrinkles from forming. Additionally, trim any loose threads and check for any holes or damage that may have occurred during stitching.
